Most of the real-life business dataset is being modified over time. For this purpose adding more rows and inserting rows and columns is often useful and makes things easier. There are multiple ways of inserting rows in Google Sheets. In this article, we are going to discuss four simple methods to insert rows in between other rows in Google Sheets.
A Sample of Practice Spreadsheet
You can download the spreadsheets from the link below. The spreadsheets contain a dataset we use here. After downloading you can practice on your own as we demonstrate here.
4 Easy Ways to Insert Rows Between Other Rows in Google Sheets
First, give a look at our dataset. We want to insert single, and in some cases, multiple rows in this dataset at various positions.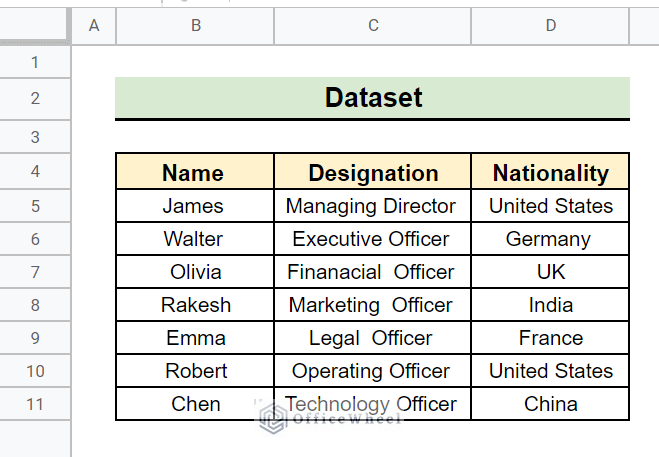
1. Using Insert Menu
The Insert Menu is well-designed for the purpose of inserting rows in Google Sheets. Single, as well as multiple rows, can be inserted using this tab.
1.1 Inserting Single Row
Steps:
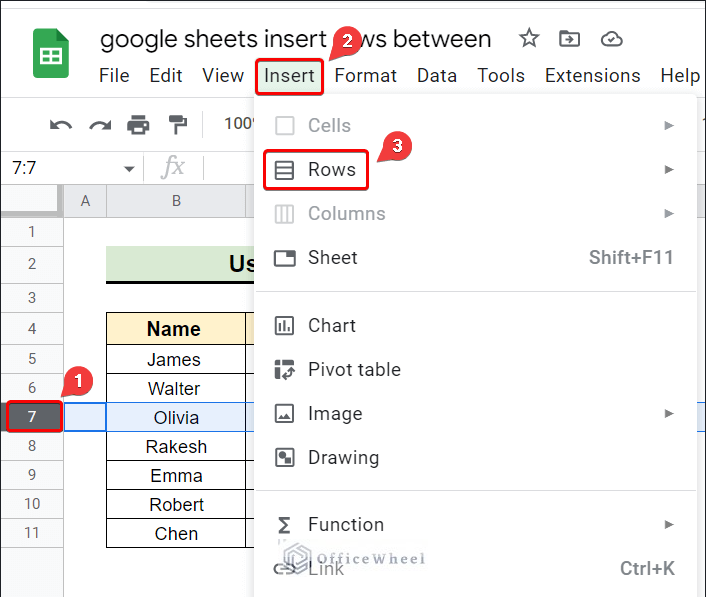
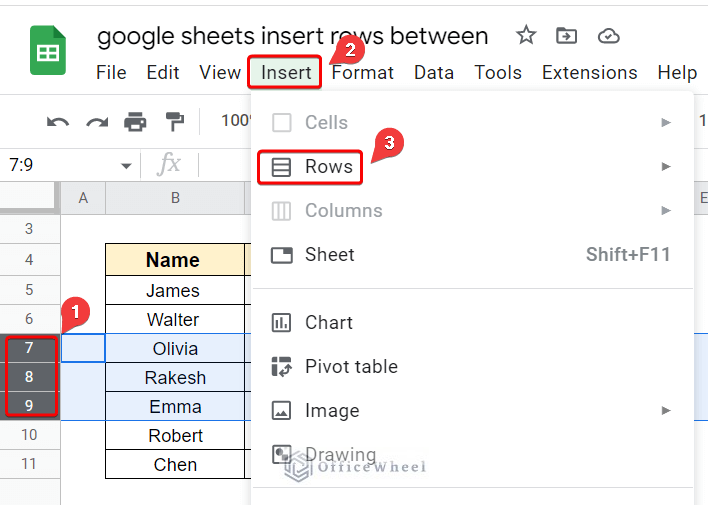
- Firstly, we have to select the row before or after which we want to insert a new row. In this instance, we select the 7th row.
- Next, we select Insert from the top menu.
- Then we select Rows for inserting rows between the 6th and 8th rows.
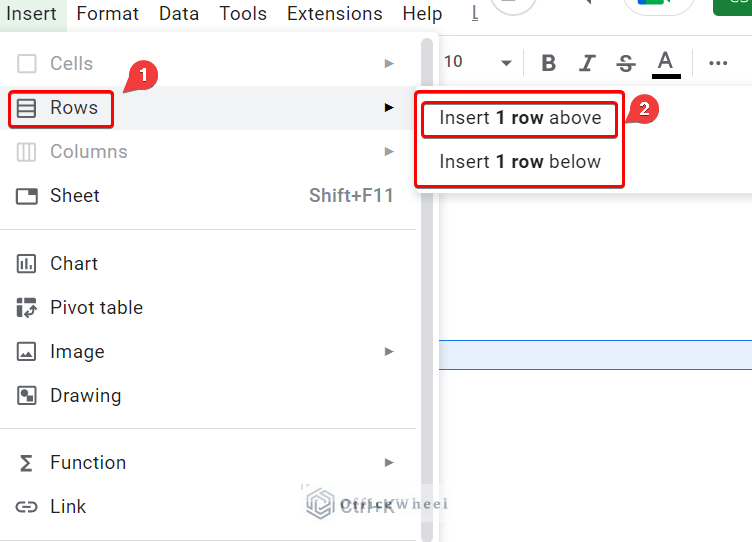
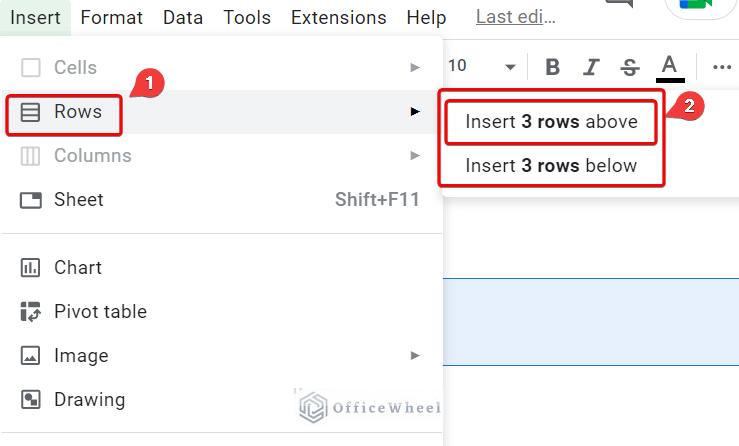
- Selecting Rows offers two options as indicated. We want to insert a row above the selected row. So, we choose Insert 1 row above.
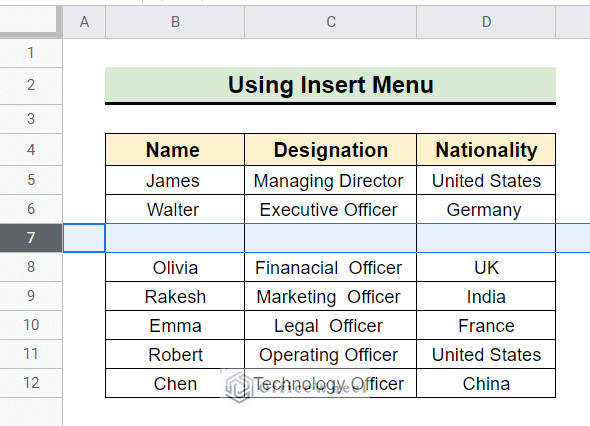
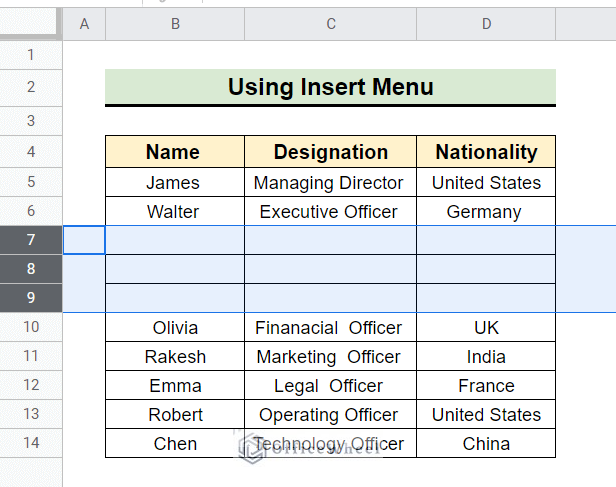
- Finally, we get the following output where a blank row is inserted above the previously selected row.
Read More: How to Insert Blank Column Using QUERY in Google Sheets
1.2 Adding Multiple Rows
We can insert multiple rows using similar steps such as inserting a single row.
Steps:
- For that initially, we have to select the rows before or after which we want to insert new rows. In this example, we select the 7th to 9th row.
- Next, we select Insert from the top menu.
- Then we select Rows for inserting rows between those rows.
- This time we have the option of inserting 3 rows above or below. Again we select Insert 3 row above.
- After clicking Insert 3 row above we have done the insertion as follows.
Read More: How to Insert Multiple Columns in Google Sheets (2 Quick Ways)
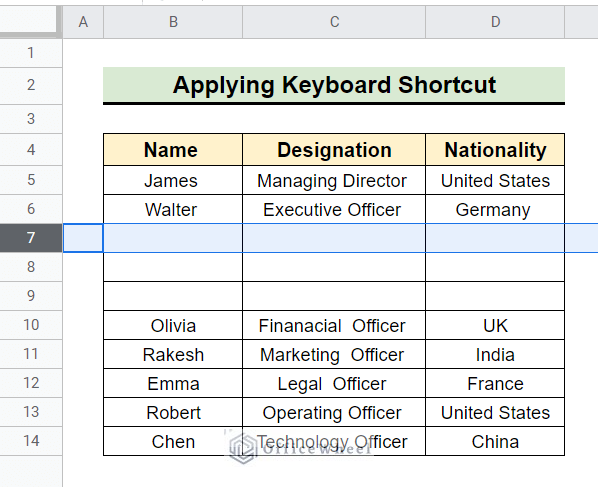
2. Applying Keyboard Shortcut
The keyboard shortcut can make row insertion in Google Sheets easy and faster. But for this, we must have the knowledge of inserting rows using the Insert menu.
Steps:
- First of all, we have to insert single or multiple rows at our desired position using the Insert menu discussed above. Here, the 7th row is inserted using the Insert menu.
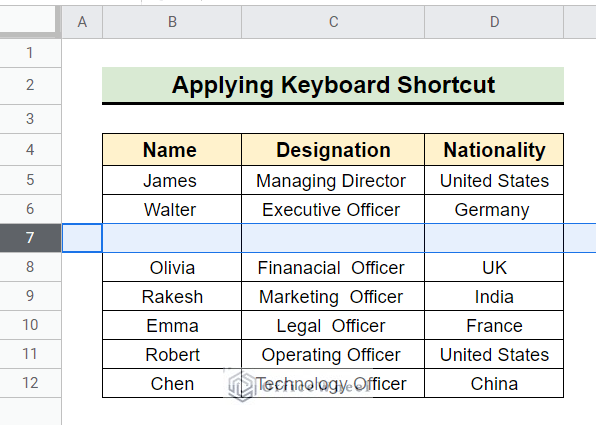
- Then, for any further insertion of rows, we have to press the F4 key only. For example, here we press the F4 key twice and this ended up with another two blank rows after the manually inserted row.
Read More: How to Have More than 26 Columns in Google Sheets
Similar Readings
- How to SUMIF Between Two Dates in Google Sheets (3 Ways)
- Insert a Header in Google Sheets (2 Simple Scenarios)
- How to Find Missing Values Between Two Columns in Google Sheets
- Insert PDF in Google Sheets (2 Suitable Methods)
- How to Insert Lines Between Cells in Google Sheets
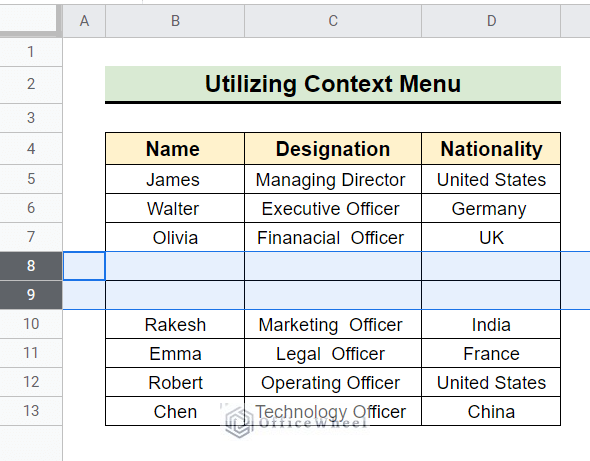
3. Utilizing Context Menu
Another useful way of inserting rows in Google Sheets is the Context Menu. It is mostly known as the Right-click menu.
Steps:
- In this method, we have to select the row or rows for the number of new rows and their position of insertion. Here we select the 6th and 7th rows because we want to insert two rows.
- Then we right-click the mouse to open the context menu.
- Finally from the Context menu, we select Insert 2 rows below.
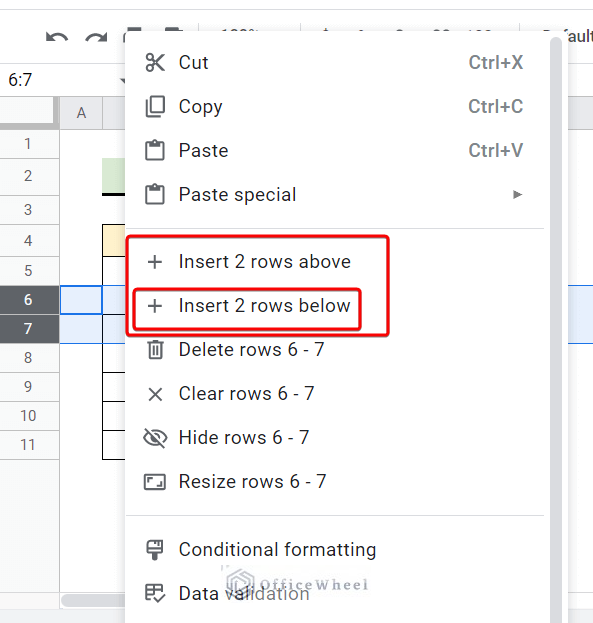
- Selecting Insert 2 rows below gives us two selected blank rows just below the previously selected rows.
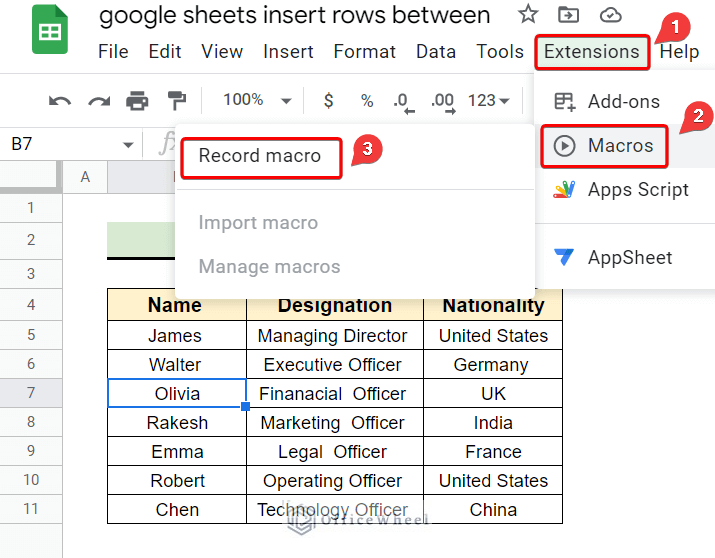
4. Using Macros Feature
The macros feature of Google Sheets functions similarly to the F4 key when inserting rows. However, the F4 key saves the latest action only whereas macros allow us to save records of numerous actions and repeat them as needed.
Steps:
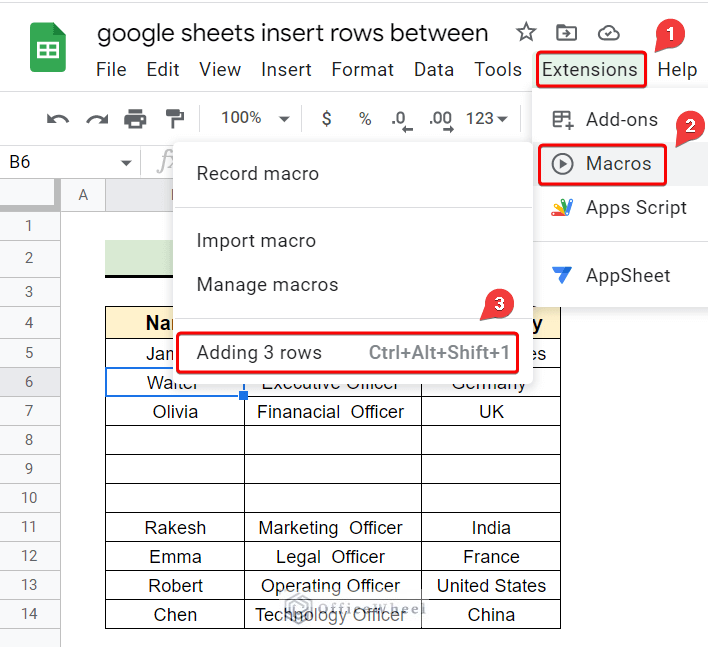
- First of all, we have to go to the Extensions in Google Sheets from the menu bar.
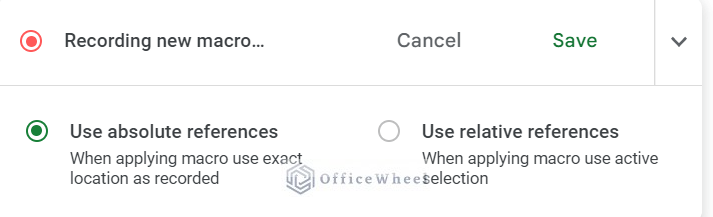
- Next, we select Macros and then Record macro. This opens a dialog box on the screen.
- The dialog box that appeared on the screen allowed us to record a new macro.
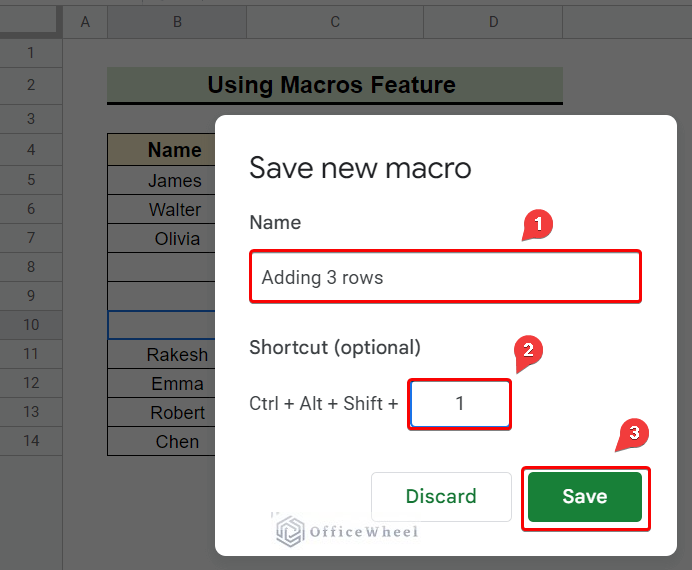
- Then we added three rows just below the 7th row of our dataset manually using the earlier methods to save the steps in a new macro. Next click Save from the dialog box.
- At this point, we can rename the new macro and can create a keyboard shortcut for repeating it. Here, we rename our new macro as Adding 3 rows and set the keyboard shortcut for it as CTRL + ALT + SHIFT + 1.
- At last, we save the recorded macro as indicated.
- For repeating the recorded macro we go to Extensions >> Macros >> Adding 3 rows.
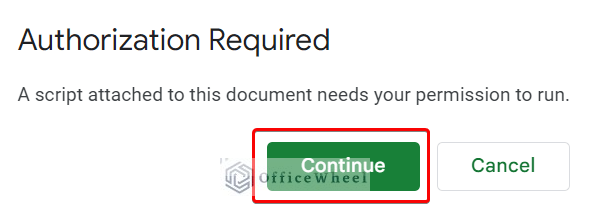
- The authorization will be required to run the Adding 3 rows macro. We select Continue to give permission to run.
- At last, the recoded Adding 3 rows macro repeat the recorded task and inserts rows as follows.

Things to Remember
- Remember, the F4 key can repeat the last work only. So, you can’t insert non-congruent rows using the F4 key.
- Try to use the macro feature when a task needs to be repeated several times.
Conclusion
In conclusion, inserting rows between other rows in Google Sheets is a fairly simple task. Therefore, we try to cover various methods of doing it to have the opportunity to see which one works best for you. Additionally, if you have any questions about the subject of this article, feel free to leave a comment below, and I will make an effort to get in touch with you as soon as possible. For the most helpful articles, visit our website, OfficeWheel.
Related Articles
- Insert Superscript in Google Sheets (2 Simple Ways)
- How to Find Unique Values Between 2 Columns in Google Sheets
- Insert Button in Google Sheets (5 Quick Steps)
- How to Find Correlation Between Two Columns in Google Sheets
- Add Parentheses in Google Sheets (5 Ideal Scenarios)
- Generate Random Numbers or Text Between Limits in Google Sheets
- Insert Error Bars in Google Sheets (3 Practical Examples)