Inserting rows may sound like a pretty straightforward task, but one wrong move or one wrong click on your precious worksheet may end up in disaster.
So today, we are going to break down not only how to insert multiple rows in Google Sheets, but also the whys that are involved. And we will be doing that step by step.
But first, let’s start with some basics.
The Basics of Inserting Rows in Google Sheets
The first thing we will try to understand is how to insert a row, a single row, and all the functions it entails. Let’s start with selection.
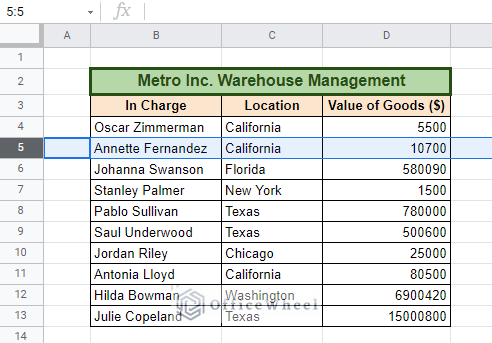
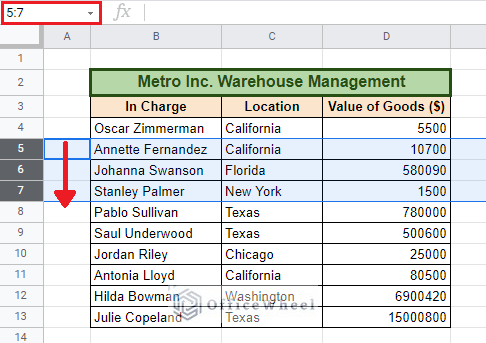
It is always a good idea to select the entire row before inserting a new row. We can easily do this by clicking on the row number presented to us on the left side of our sheet:
Next, we insert the row. We can go about this in two ways:
- Using the Insert Tab
- Using Right-Click
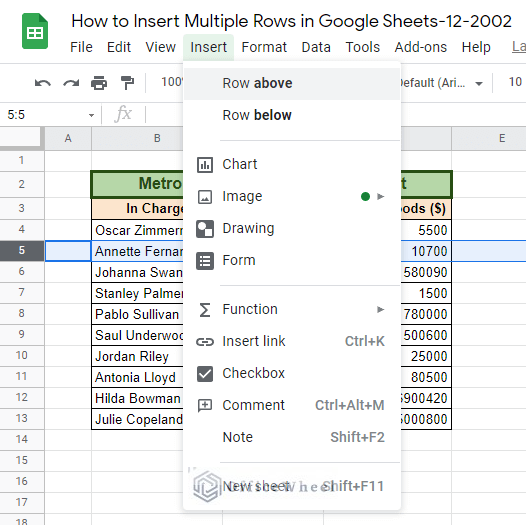
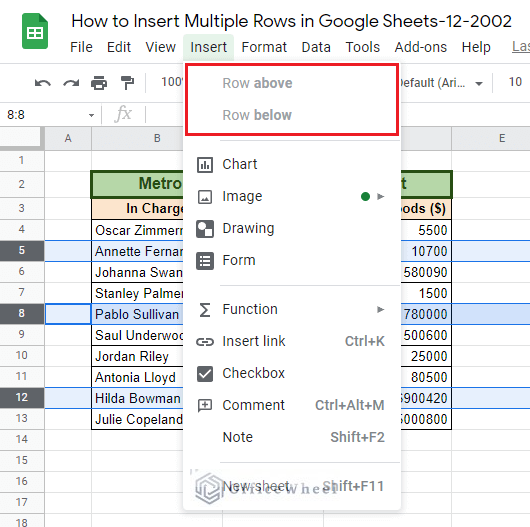
The Insert tab can be found on the top ribbon of the window. Clicking on it will present us with a tray of options, and if you have a row selected, the options Row above and Row below will be available. You can already guess what will happen if you click on either.
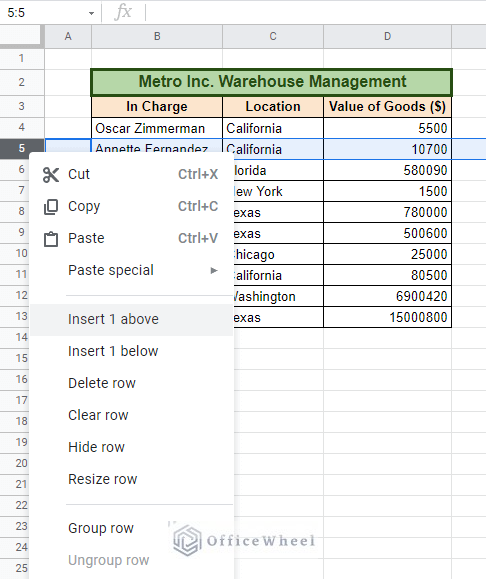
We can also bring up the insert options by Right-Clicking over the selected row. It will give us the same result.
While not that important, you can also ask: What happens if we just select a cell instead of the entire row and click insert?
To put it simply, if you are using the Insert tab method, you will get the same options as before. However, if you are going for the Right-Click method, you will only get one option for rows. Selecting this option will, by default, insert rows above.
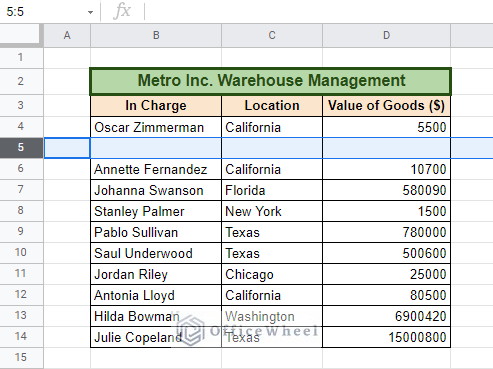
A row inserted above
Now that we have got the fundamentals of inserting a row in Google Sheets out of the way, let’s now dive into our main topic for the day.
4 Ways of How to Insert Multiple Rows in Google Sheets
1. Insert Multiple Adjacent Rows in Google Sheets
For this method, we will be looking at how we can insert multiple adjacent rows in Google Sheets.
Step 1: Select the number of rows that you want to insert. You can do this by clicking on the row number and:
- Dragging the mouse up or down until the number of rows is selected, or
- Holding down the SHIFT key and pressing the Up or Down Arrow key on your keyboard
Until the number of adjacent rows is selected.
Step 2: Right-click over the selected rows or open up the Insert tab to insert the rows. In the following image you can see that for us it says Insert 3 above and Insert 3 below according to the number of rows we have selected.
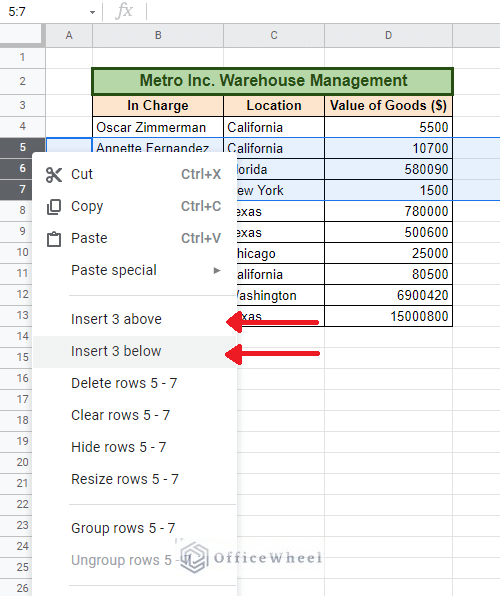
If we had 2 rows selected, it would say 2, and if we had 10 rows selected, it would have said 10.
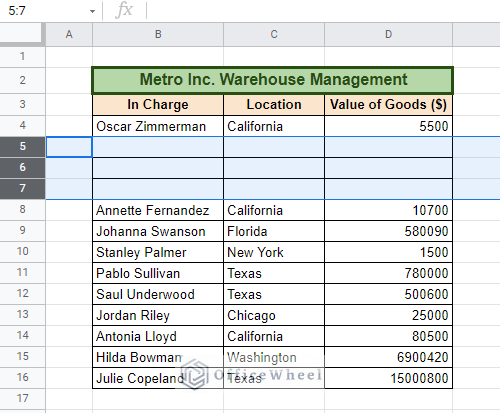
Step 3: Select the option that you require. In our case, we have selected Insert 3 below.

And this is what it would have looked like if we selected Insert 3 above:
Keyboard Shortcuts
At one point, you may reach a point of expertise, or you already are. In such a case, here are some keyboard shortcuts to help you out for inserting rows in Google Sheets:
- Insert the number of selected rows above: Ctrl + Alt + Shift + = OR Ctrl + Alt + =
- Keypress Macro (Insert Above):
-
- Alt + I, then R (Chrome browser only)
- Alt + Shift + I, then R (other Browsers)
-
- Keypress Macro (Insert Below):
-
- Alt + I, then W (Chrome browser only)
- Alt + Shift + I, then W (other Browsers)
-
2. Insert Multiple Non-Congruent Rows with Keyboard Shortcut
What if you wanted to insert multiple rows that are not adjacent to each other?
Unfortunately, this is not possible in Google Sheets.
As you can see in the following image, we have selected three non-congruent rows in our workbook (hold CTRL and click desired row numbers). But when we open up the option tray by right-clicking, the Insert row option does not appear.
The same goes for the Insert tab, the options are greyed out.
This is one major limitation of Google Sheets. But we have a workaround to this.
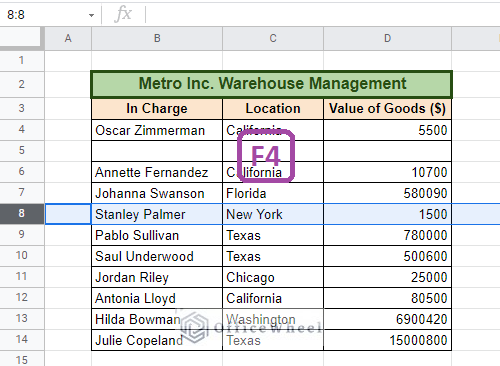
For this problem, we will the utilizing the F4 key of our keyboard.
In Google Sheets, what the F4 keypress does is that it repeats the last action taken.
As you can see, we have first inserted a row above row 5 in the usual way. Google Sheets has kept this action in its memory.

Now, if we select row 8 and press F4, we see that another row has been inserted above it.
Before F4
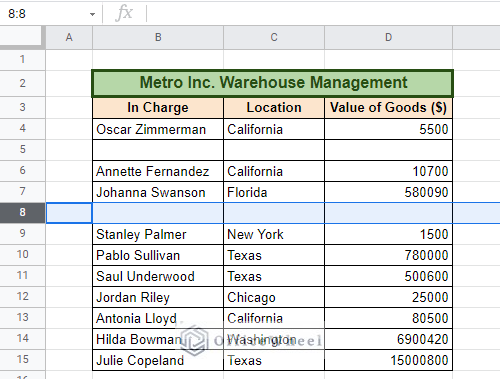
After F4
Google Sheets has repeated its last stored action. We can apply this multiple times.
While it is true that having a direct option to insert non-adjacent rows would have come in handy, but this method will still save you a lot of time.
On top of that, this method can be used for ALL actions taken in Google Sheets, not only for inserting rows!
3. Add More Rows at the Bottom of the Sheet
As the name suggests, this method is purely about adding more rows to the bottom of the end of the worksheet.
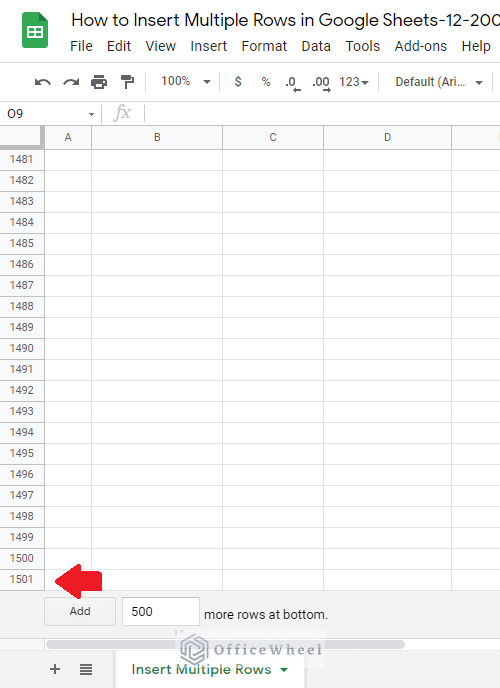
As you can see, at the bottom of the worksheet, the number of rows goes to about a thousand.
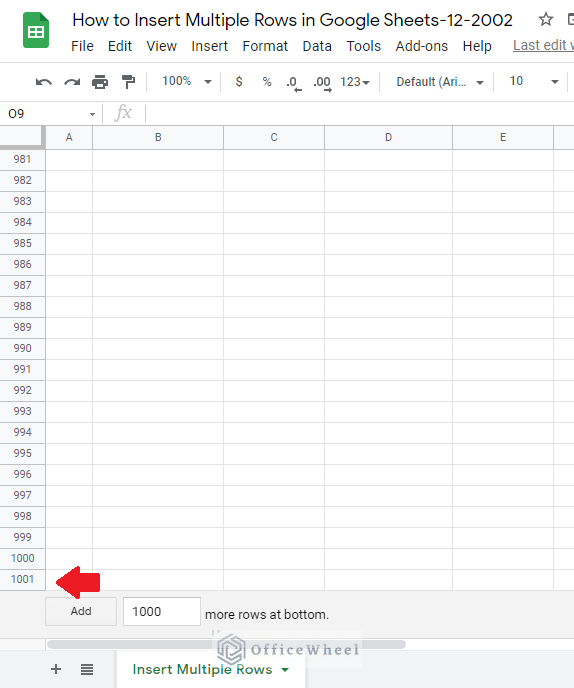
Many datasets have more than a thousand rows of data. In such cases, we can utilize the Add more rows button over here.
All you have to do is simply input the number of rows that you want to add to the box and press Add.
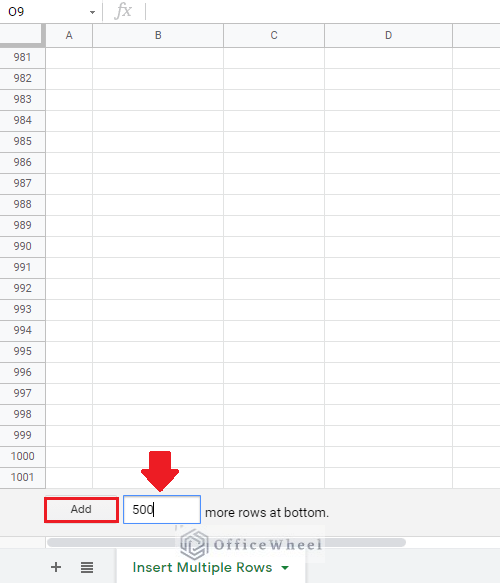
Et voila! We have successfully added 500 rows to our worksheet.
As you have noticed, this method only shines when you have too much data to work with.
4. Insert Multiple Rows Using Macros in Google Sheets
This is a more technical approach to our method 2 as it involves creating and applying macros.
Let’s go about this process step by step:
Step 1: Select the Tools tab in the top ribbon. Here you will find the option Macros. Selecting this option will allow you to also select the option Record macro.
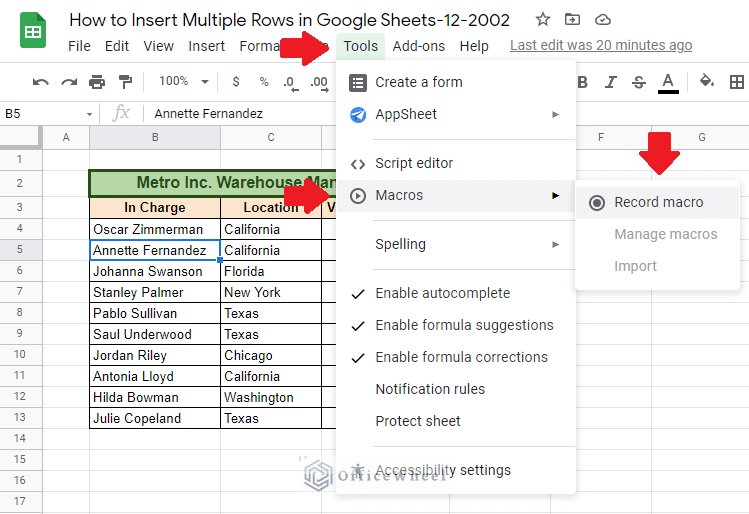
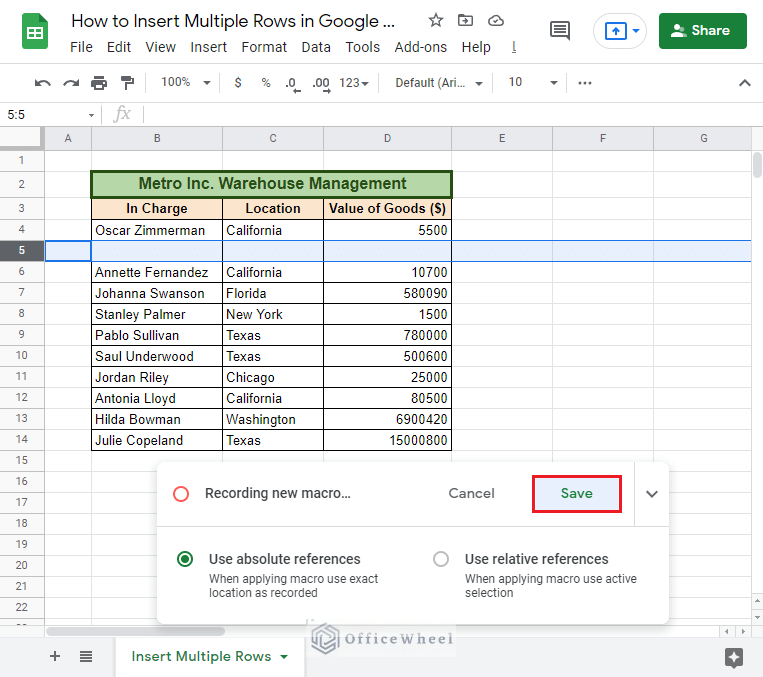
Step 2: After clicking on Record macro, the following panel will pop up at the bottom of the sheet. This represents that whatever action you will be taking now will be recorded.
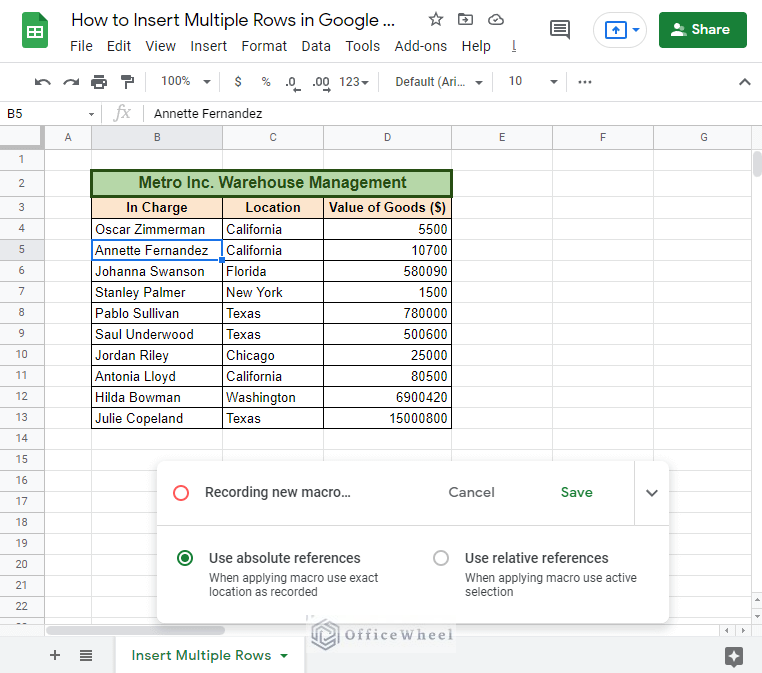
After you are done recording actions, click Save. In our case, the action was “inserting a new row above row 5”.
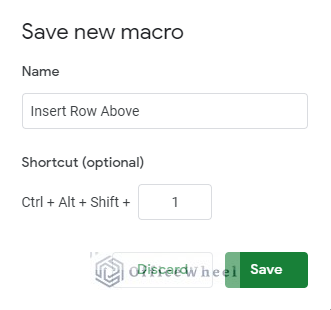
Step 3: Clicking on Save will open up a Save new macro dialogue box. Here you can name your new macro as well as assign a shortcut to it. Click Save again.
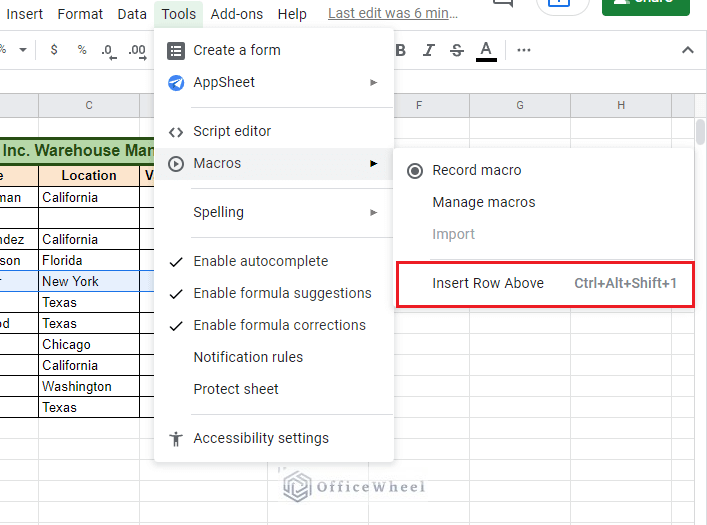
Step 4: To run the macro you can utilize the shortcut that you have saved it under, or you can navigate to the Tools tab > Macros > (Name of your macro).
In our case, the macro will keep on adding a new row above row 5 every time we activate it.
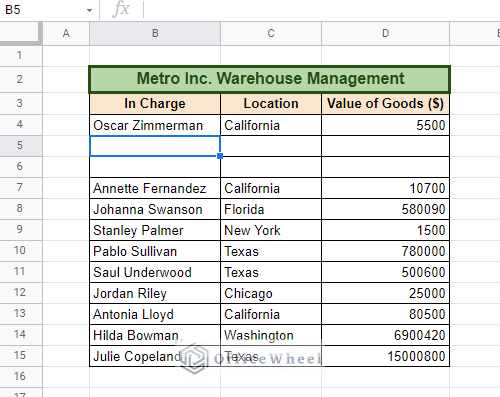
In this way, you can repeat a certain action multiple times, and it is not only restricted to adding new rows or multiple new rows.
Remove Multiple Rows
So far, we have been adding multiple rows, so it is also important to understand how to remove multiple rows as well.
Unlike inserting rows, removing multiple rows is more of a walk in the park.
Step 1: Highlight the rows you want to remove.

Step 2: Right-Click on the highlighted rows, this will open up the options available. Click Delete rows …
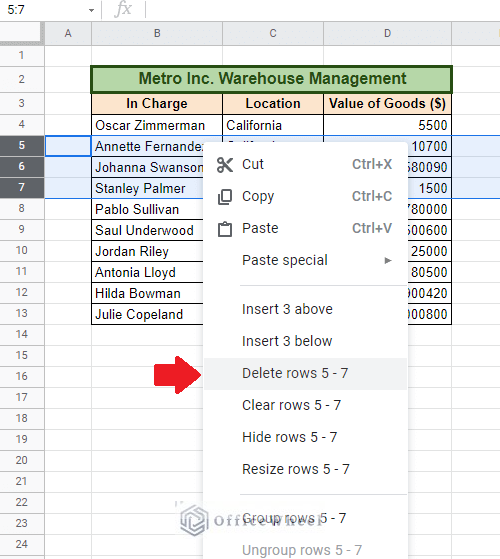
The result:
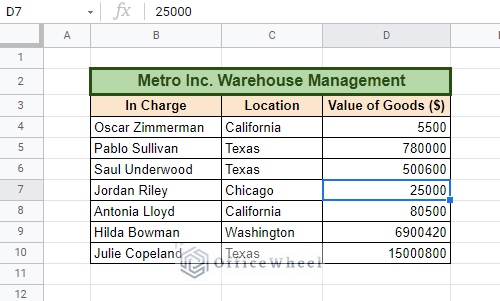
Great! The rows have been deleted.
Limitations (Google Sheets)
To summarize, the only limitation we have found is purely on the side of Google Sheets. To be more precise, it is what we faced in method 2 – the inability to add rows to multiple non-congruent selections.
This is also to be expected since Google Sheets is a fairly lightweight application, especially when compared to Microsoft Excel.
Final Words
All in all, how to insert multiple rows in Google Sheets has proved to be fairly straightforward. And thus, we have tried to cover the different iterations of the approach as the situation may not be the same all the time. Let us know if our article has proved helpful to you, and we also welcome tips from you guys.