In this tutorial, we will look at how we can insert a timestamp in Google Sheets. There are multiple approaches we can take, taking into consideration conditions like expertise and scenarios.
Let’s get started.
How to Insert a Timestamp in Google Sheets
For a browser-based application like Google Sheets, recording any updates to a worksheet is natural. You may have already experienced this when you see the application save each time some date is entered, deleted, or updated.
A better representation of this is the Edit History of Google Sheets.
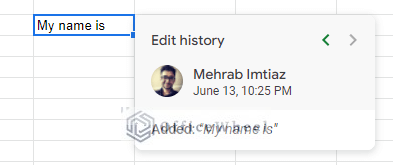
Every time a cell is updated in Google Sheets, the application stores a record of the user who updated it and the time when it was done. To see the Edit History of a cell, simply right-click over the cell and select “Show edit history”.
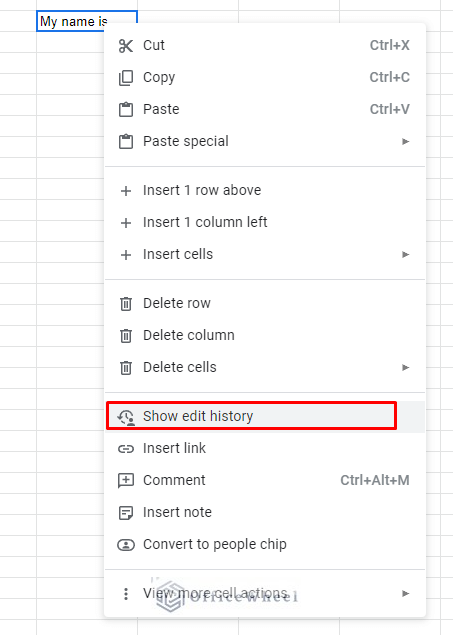
It looks something like this:
A Timestamp is essentially the representation of the Edit history of the cells as data that is generated in a cell in Google Sheets.
And there are three different ways we can generate this data:
- Keyboard shortcuts
- Functions and Formulas
- Google Apps Script
Let’s see how we can use each of these options and what form of results they produce.
1. Using Keyboard Shortcuts (Static Timestamp)
To generate a timestamp, one can simply input the current date and time in a cell in Google Sheets. But it can take a long time to type down and it is not very efficient when working with a lot of data.
Thankfully, we have keyboard shortcuts to instantaneously generate the current date and time that can act as timestamps in Google Sheets.
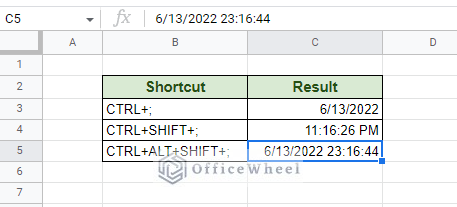
Keyboard shortcut for current date:
CTRL+; (⌘ + ; for Mac)Keyboard shortcut for current time:
Keyboard shortcut for current date and time:
An important point to note about these timestamps generated by keyboard shortcuts is that they are static timestamps.
This means that the timestamp generated by keyboard shortcuts does not automatically update with any further changes done in the worksheet.
This is perfect if you need static timestamps.
2. Using Running Functions to Insert a Dynamic Timestamp in Google Sheets
We have two very special functions when it comes to generating the current date and time in Google Sheets: TODAY and NOW.
TODAY gives us the current date, whereas NOW gives us the current date and time. Neither of these functions requires any arguments to work:

Both functions can be used to generate a dynamic timestamp in Google Sheets.
This dynamism comes from the fact that both are “running” functions. This means that every time a cell is changed in the worksheet, the TODAY and NOW function iteratively calculates the date and time, giving its users the latest data.

As you can see, every time a cell is changed regardless of location, the NOW function updates its data.
This calculation is a double-edged sword. While it does give a dynamic timestamp, the background calculations take a lot of processing power. So, having more than one of these functions can slow down the spreadsheet.
However, there is a way to turn off this iterative calculation which will allow you to create a static timestamp with these functions:
Putting a Limit on Iterative Calculations to Create a Static Timestamp with Functions
Here we have a simple worksheet:
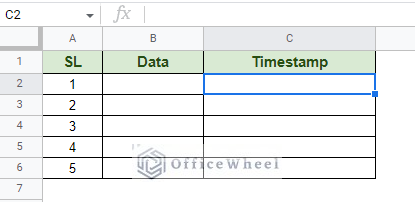
Our objective is to generate a timestamp in the Timestamp column every time an adjacent cell of the Data column is filled.
Step 1: Add following formula in the Timestamp column:
=IFS(B2="","",C2="",NOW(),TRUE,C2)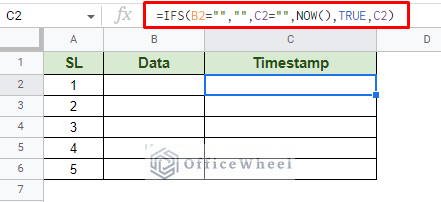
We set our conditions with the IFS function. The formula essentially says if the adjacent cell in column B is blank, return a blank. When data is entered in column B, return the current date and time using the NOW function.
But, when we enter a value in column B, we get the following error:

This is because the formula is iterative (thanks to NOW) and is sending it into a never-ending loop.
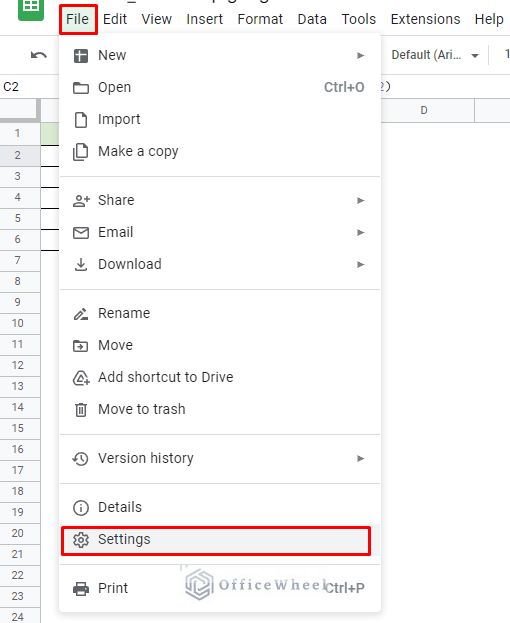
Step 2: To remedy this we will follow the suggestion given by Google Sheets and change the calculation settings. You can find Settings under the File tab.
File > Settings
Step 3: Do the following in the Settings window:
- Move to the Calculation tab
- Set the Iterative calculation to “On”.
- Set the Max number of iterations to 1.
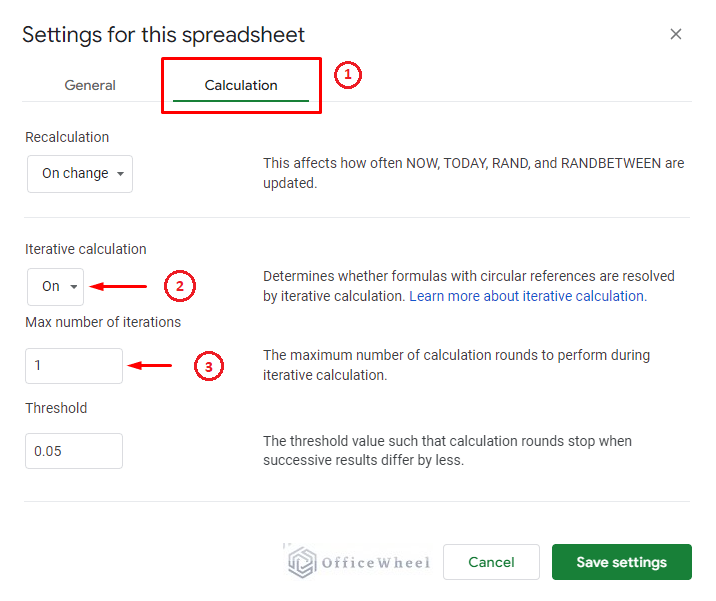
Save the settings to see the results.
Step 4: After clicking Save, the worksheet will reset, so your timestamp may look something like this:
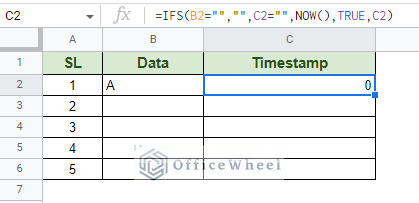
Simply update the cells to your desired date format and re-enter the data.
The result after some tweaking:
The resultant timestamps are static and do not change when further updates are made to the adjacent cells.
3. Using Apps Script to Generate a Timestamps when Data is Entered in a Cell
While keyboard shortcuts and functions are great approaches to insert Timestamps in Google Sheets, they still need direct user intervention to insert (shortcuts) or create (formulas) to be effective.
Though the latest method we have just shown, the formula with IFS and NOW, comes close to having an automatic and static timestamp as possible.
However, to make a fully automatic and static timestamp, we need the assistance of Google Apps Script.
We will use a similar dataset as the last example. Since we are going fully automatic, we don’t have to worry about any column limitations. We will use the entirety of column C for the timestamps.
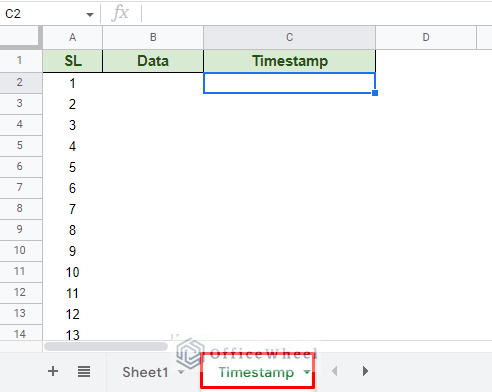
Take special care to remember the worksheet name, we will need it later.
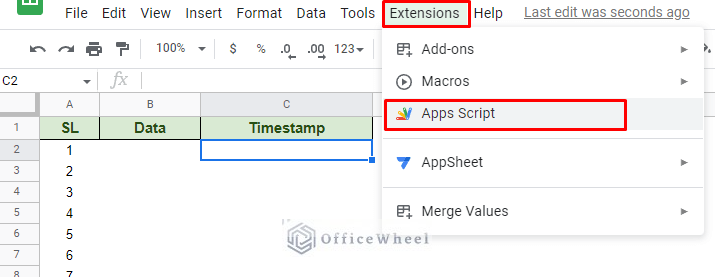
Step 1: Navigate to Apps Script from the Extensions tab.
Extensions > Apps Script
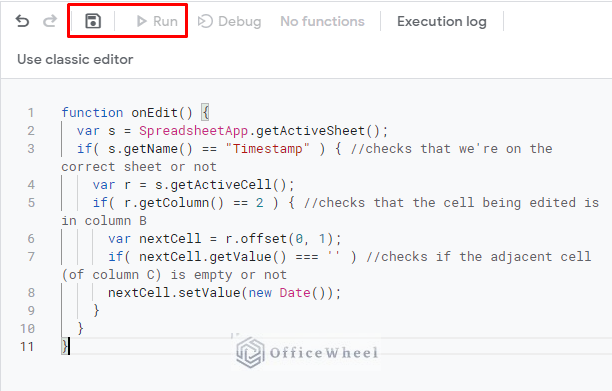
Step 2: Name the project and insert the following script:
function onEdit() {
  var s = SpreadsheetApp.getActiveSheet();
  if( s.getName() == "Timestamp" ) { //checks that we're on the correct sheet or not
    var r = s.getActiveCell();
    if( r.getColumn() == 2 ) { //checks that the cell being edited is in column B
      var nextCell = r.offset(0, 1);
      if( nextCell.getValue() === '' ) //checks if the adjacent cell (of column C) is empty or not
      nextCell.setValue(new Date());
    }
  }
}
Step 3: Click Save and then Run to apply and execute the script.
The result:
The script relies on three IF statements to work:
- IF statement in Line 3: Checks whether we have the correctly named worksheet or not. This is case-sensitive and limits the script to just one worksheet of the active spreadsheet.
- IF statement in Line 5: Specifies the column that the script will check to see data entry. Since our Data column is column B, the column number will be 2.
- IF statement in Line 7: Checks if the adjacent cell is empty or not. If it is already filled, perhaps with a timestamp, then the script will not make any changes. This condition makes the script static.
Learn More: Apply an Automatic Timestamp Using Google Sheets Script (3 Easy Ways)
Further tweaking of the script can also allow you to generate a timestamp every time a cell is updated in Google Sheets.
Final Words
Timestamps can be inserted into a Google Sheets spreadsheet in multiple ways. And depending on the requirements and the expertise of the user, there is a solution for all, from keyboard shortcuts to using Apps Script to create a function itself.
Feel free to leave any queries or advice you may have for us in the comments section below.
Related Articles for Reading
- How to Format Date with Formula in Google Sheets (3 Easy Ways)
- How to Autofill Date in Google Sheets (A Comprehensive Guide)
- Find Number of Days in a Month in Google Sheets (An Easy Guide)
- How to Sum a Duration of Time in Google Sheets (An Easy Guide)
- Convert Date to Month and Year in Google Sheets (A Comprehensive Guide)