The SORT function in Google Sheets is a fundamental, yet very handy function to know about. And we are going to be breaking down its uses in this article today.
Basics of the SORT Function in Google Sheets
Let’s start with understanding the SORT function syntax:
SORT(range, sort_column, is_ascending, [sort_column2, is_ascending2, ...])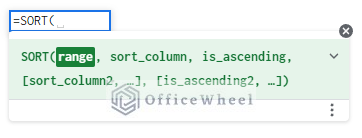
Function Breakdown:
- range: The range of data that is to be sorted and extracted.
- sort_column: The index of the column within our range selection by whose values our data will be sorted. You can also use the range of the column. You must use the range of the column if the sorting data is outside of the selected range.
- is_ascending: The sorting condition of the selected data. Takes TRUE/1 for ascending order or FALSE/0 for descending order.
- [sort_column2, is_ascending2, …]: This is Optional. You can add more column conditions to the sort in order of priority.
Like all functions, SORT extracts a range of data and presents the results in another cell. For a simple ascending order sort of a single column, the conditions other than the range is optional.
=SORT(B3:B12)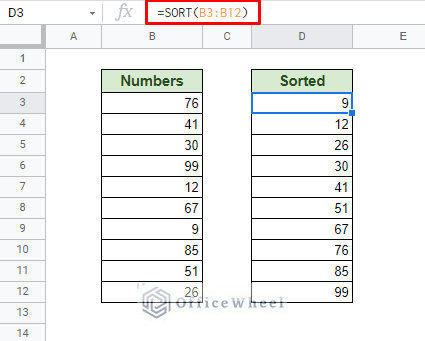
5 Examples of Using the SORT Function in Google Sheets
1. Sorting Text or Numbers
The SORT function can work with both text and numbers in Google Sheets.
As we have just seen in the previous section, the SORT function sorts numbers in the ascending order by default.
As for text values, the SORT function arranges the data alphabetically for the same formula.
=SORT(B3:B12)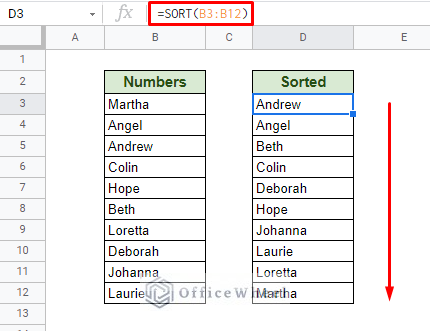
2. Sort in Ascending or Descending Order
The SORT function wouldn’t be very useful if we couldn’t control how our data is to be sorted.
Looking back at the syntax of the function, we have a field called is_ascending. This field takes a Boolean value (TRUE/FALSE) or a Binary value (1/0) respectively to determine whether we want our sorted result in the ascending or the descending order.
If nothing is inputted, the function sorts in the ascending order, as we have seen previously. However, we can input what order we want ourselves.
For ascending order:
=SORT(B3:B12,1,TRUE)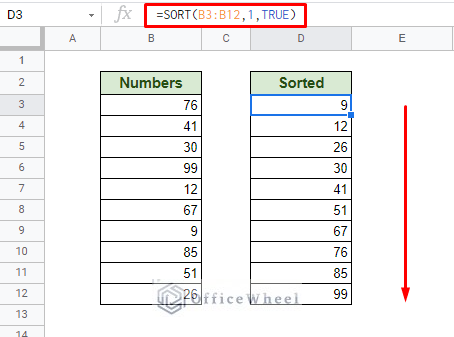
For descending order:
=SORT(B3:B12,1,FALSE)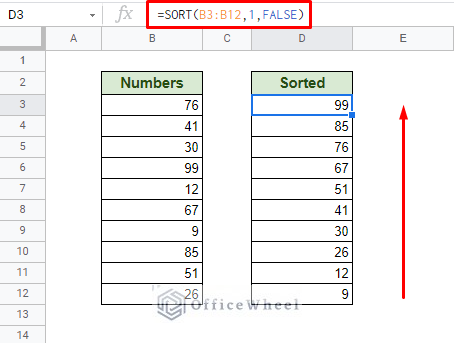
Note: We can replace TRUE with 1 and FALSE with 0.
Read More: How to Sort by Value in Google Sheets (With Examples)
3. Sorting Dates With the SORT Function
Date values in Google Sheets are considered to be similar to numbers, as such, they are aligned to the right. You don’t need any special formatting to use the SORT function on them.
=SORT(B3:B12,1,1)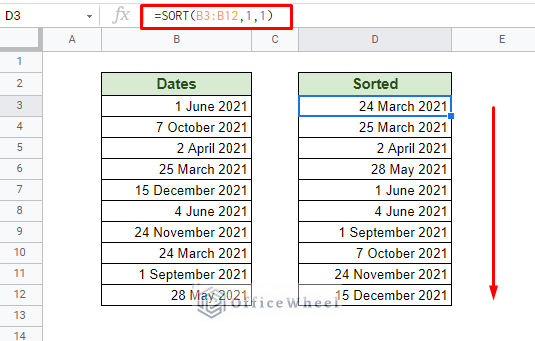
For an in-depth breakdown and tips regarding sorting dates, please visit our How to Sort by Date in a Google Spreadsheet article.
4. Using SORT Function on Multiple Columns in Google Sheets
Most datasets in Google Sheets come with multiple columns of values. The SORT function allows us to work with all of it in a single function.
To show our example, we will use the following dataset:
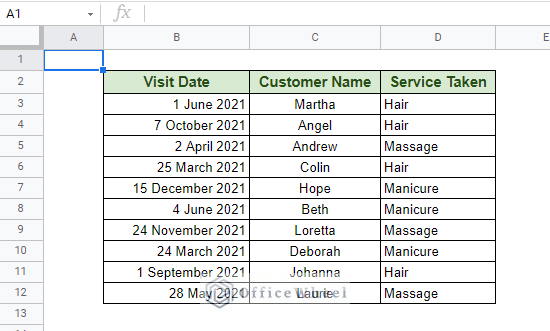
Here we have three types of data we can work with: Visit Date (numerical/date), Customer Name (text), and Service Taken (text/group)
For our task, we want to sort the entire table in the ascending order of the Visit Dates.
Our formula:
=SORT(B3:D12,1,TRUE)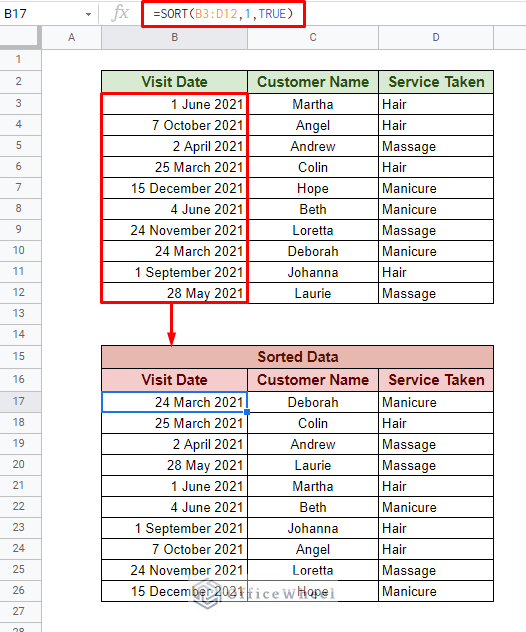
Formula Breakdown:
- B3:D12: The range of our data. We have included the data of all three columns.
- 1: The sort_column index. Since we are sorting by Visit Date, we use its index from our selection, which is 1.
- TRUE: We will arrange our data in ascending order.
Read More: SORT Function for Multiple Columns in Google Sheets
Similar Readings
Extra Tips
1. Using Column Reference: You can also use column range reference instead of column index for the sort_column field.
=SORT(B3:D12,B3:B12,TRUE)
2. Multiple Column Conditions: The SORT function allows us to use more than one column as a condition to sort data. This is done in a hierarchical form, meaning that the first column input takes priority.
Let’s say we want to sort our table by Service Taken first and then by the descending order of the Visit Date.
=SORT(B3:D12,3,TRUE,1,FALSE)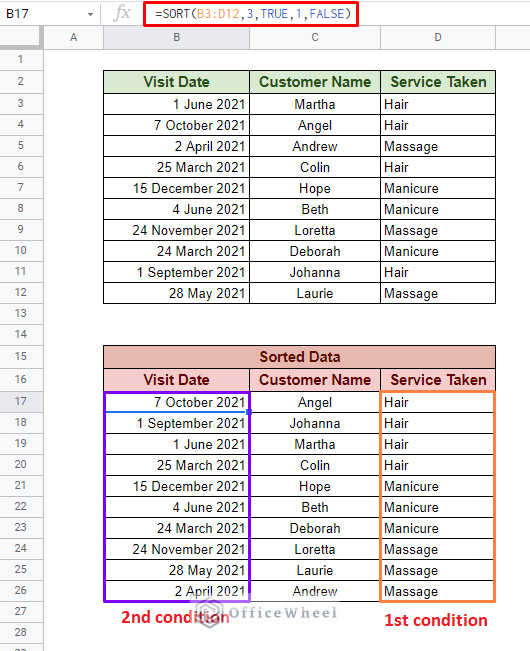
5. Using SORT with Horizontally Arranged Data
This is more of an extra example for when your data is arranged horizontally instead of having the traditional vertical columns.
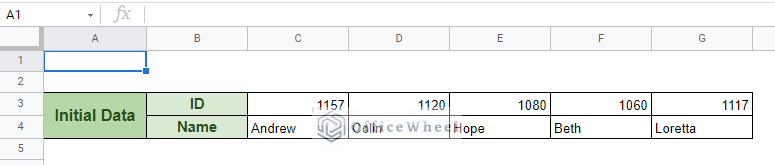
Since the SORT function cannot handle this type of data arrangement, we take the help of the TRANSPOSE function. We apply it in two separate positions:
- Around the data_range. So that the SORT function recognizes the data in a proper arrangement.
- Around the SORT function itself. So that our results are also presented in the original format. You can ignore this if you want a traditional table output.
=TRANSPOSE(SORT(TRANSPOSE(C3:G4),1,TRUE))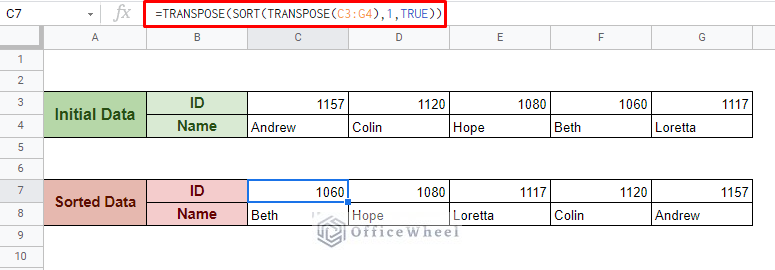
Final Words
As you have just seen, mastering the SORT function in Google Sheets is not that difficult, and the ways it can be utilized are many. We hope you will now be able to utilize this amazing function for your daily tasks.
Feel free to leave any queries or advice you might have for us in the comments section below.