There are multiple ways of how you can put a date in Google Sheets and our target today is to cover all of these in one single article. We will be starting off with the simplest ways then move on to the more technical ones.
Let’s get started.
3 Ways to Put Date in Google Sheets
1. Insert Static Date in Google Sheets
Depending on your locale, Google Sheets may have a different date format that it recognizes.
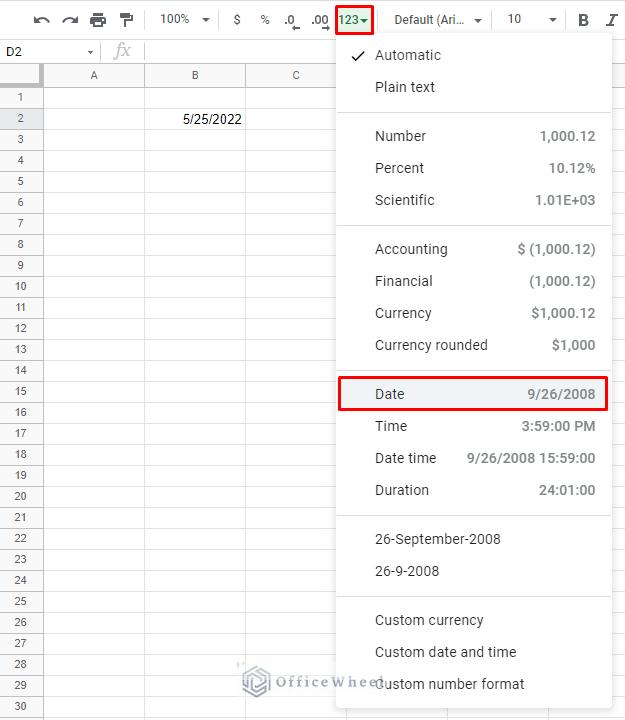
You can check what format your application recognizes by clicking on the number format button in the functions ribbon:
As you can see, our default date format is the MM/DD/YYYY.
Why is knowing the default date format necessary?
We all know that Google Sheets views dates as numbers and it is crucial that it does so, so that we don’t get any errors when doing calculations with dates in our spreadsheet.
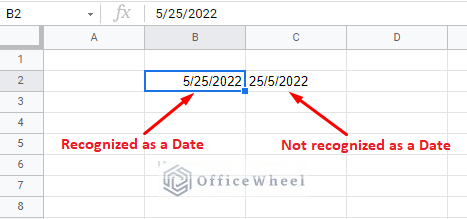
Therefore, if we do not input our date in the recognizable format, Google Sheets will view the input as a text and we will not be able to use the date in our calculations.
Conclusion: We must input our dates in Google Sheets in the recognized format.
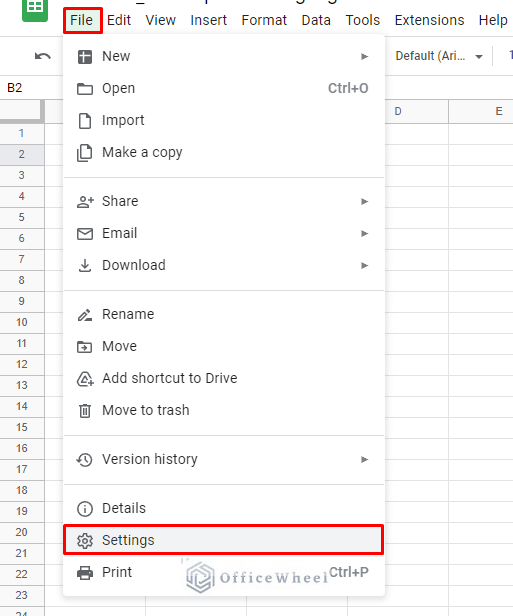
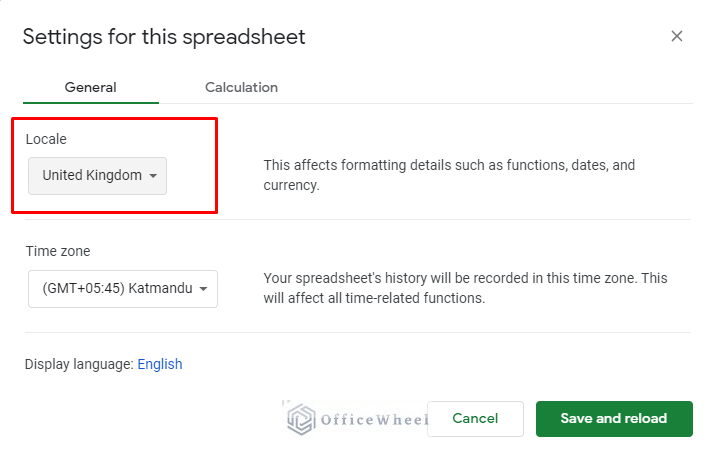
If that doesn’t satisfy you, you can always change the locale of your spreadsheet from the Settings.
To change to the DD/MM/YYYY format, simply change the locale to the United Kingdom and click Save and reload.
Using Keyboard Shortcuts
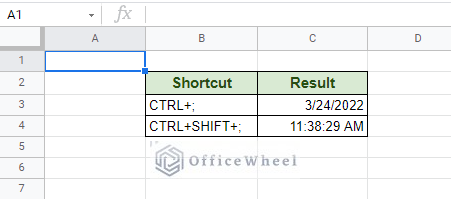
Google Sheets has a couple of keyboard shortcuts to allow its users to input the current date or time. These can prove to be quite efficient if you are looking to input time stamps.
The keyboard shortcut for the current date:
CTRL+;The keyboard shortcut for the current time:
CTRL+SHIFT+;Note: Replace the CTRL with CMD or the “pretzel’ key if you are using a Mac.
2. Using Date Picker to Input Date in Google Sheets
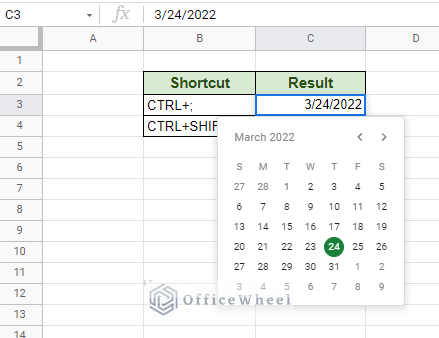
The Date Picker is one of the most efficient and intuitive ways to put a date in a large Google Sheets spreadsheet.
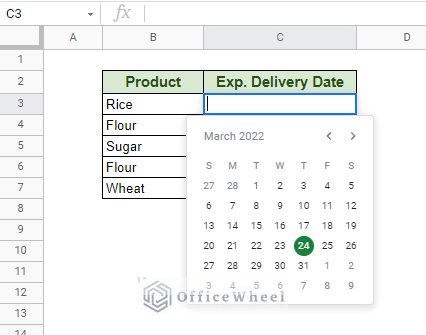
This works best when you have to input a large number of different dates over a large range of cells. The Date Picker naturally appears when you double-click a cell containing a date in Google Sheets:
However, you can hard-apply the Date picker over a range of cells quite easily, you only have to follow a few steps. The idea is to transform a cell so that it only takes dates as an input.
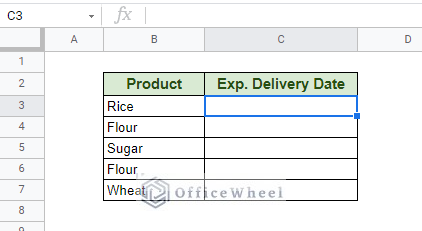
In the following dataset, we will be applying the date picker on the Exp. Delivery Date column.
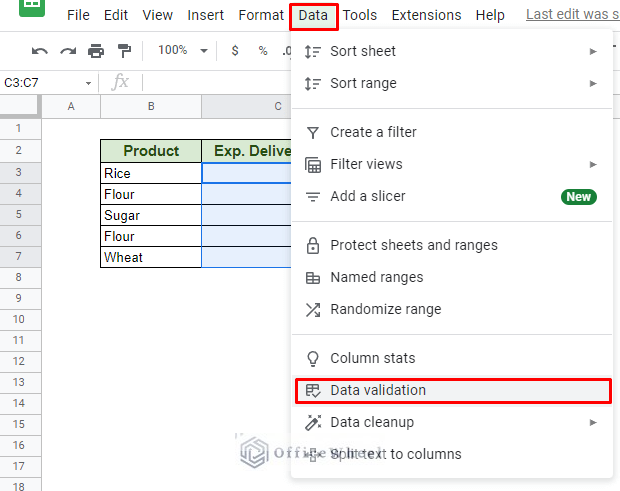
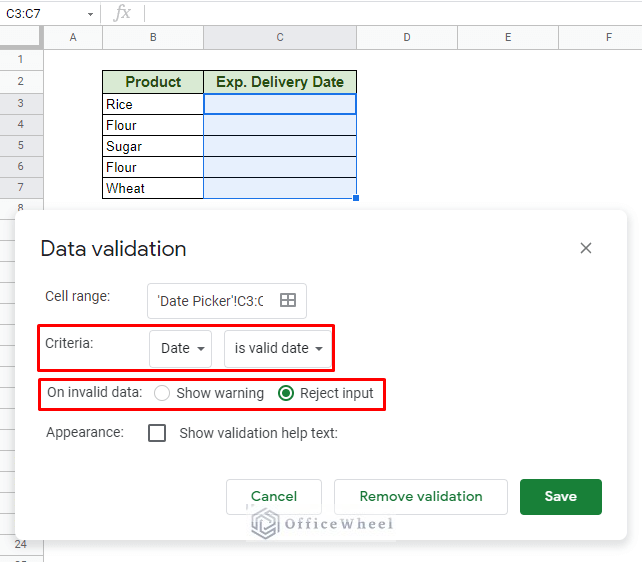
Step 1: Select the range of cells and navigate to the Data validation option from the Data tab. Data > Data validation
Step 2: In the Data validation window, select the following options:
- Criteria: Date and is valid date
- On invalid data: Reject input
Step 3: Click Save to apply.
Now, you can simply double click in the empty cell and the Date Picker will be presented.
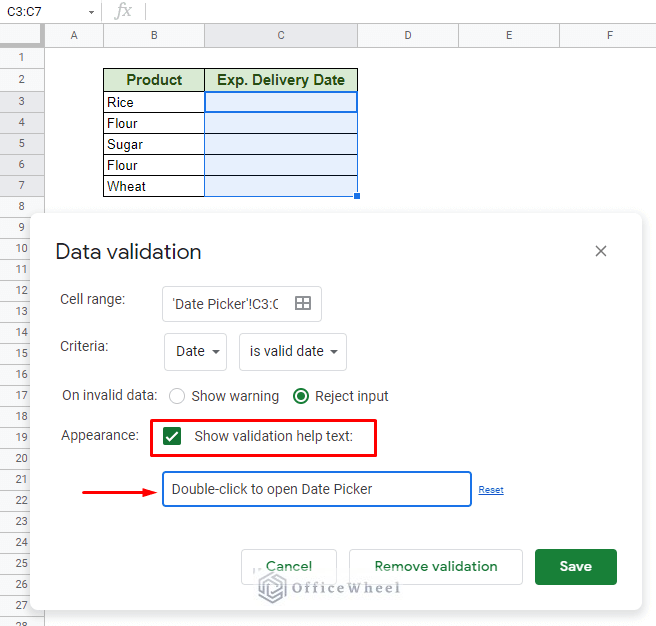
Extra Tip: You can also apply a pop-up message in the Data validation window to prompt users to double click to open the date picker.
Why use the Date Picker?
- The Date Picker will ensure that the input data is a valid date.
- It allows users to double-check the week or year in an interactive user interface.
- It is possibly the most intuitive and easiest method to insert a date. Very handy for beginners.
- The Date Picker interface shows a much more recognizable format to help pick the correct dates (considering weekends and holidays).
3. Using Functions to Put Date in Google Sheets
Besides manually inputting dates, we also have a few built-in functions that can help us put a date in a Google Sheets spreadsheet.
I. The TODAY Function
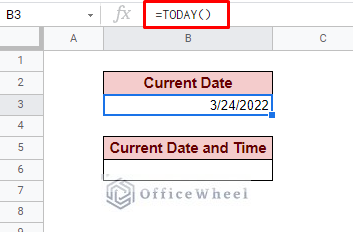
First up we have the TODAY function. This function returns the current date in Google Sheets. It does not take any parameters either.
Simply type in the function in the designated cell:
=TODAY()II. The NOW Function
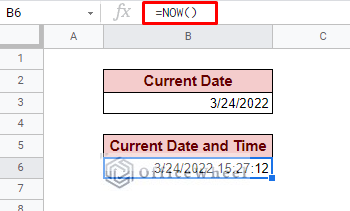
The NOW function takes things one step further to not only display the current date but also the current time.
Again, type in the function without any parameters:
=NOW()Point to Note
Both TODAY and NOW return dynamic or running dates and times. Meaning, every time the spreadsheet is opened, the dates and times may change depending on when it is opened.
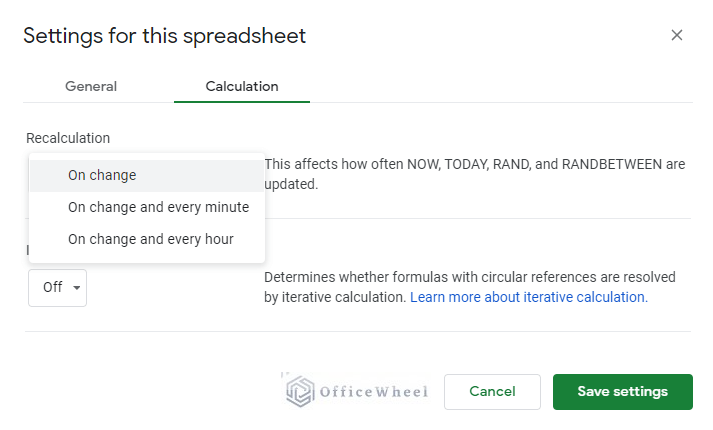
You can check or even alter this feature from Spreadsheet Settings under the File tab.
Here in the Calculation tab, you can see the Recalculation options that are available for functions that return dynamic or running results. You can change this as needed.
For a more in-depth guide, please visit our Find and Display Current Date in Google Sheets article.
Final Words
That concludes all the ways we can put a date in Google Sheets. We hope that our discussion enlightened you to new ways to work with dates in Google Sheets.
Feel free to leave any queries or advice you might have for us in the comments section below. Also, check out our other date-related articles that are sure to deepen your understanding.

