One of the best features that Google Sheets has to offer is its autofill feature. It is smart enough to understand what type of data the user needs as well as quite easy to use. We will take advantage of this today and see how we can use it and other methods to continue dates in Google Sheets.
Let’s get started.
Basic Autofill: Dragging the Fill Handle to Continue Dates in Google Sheets
Autofill with the fill handle is one of the best and most user-friendly features that Google Sheets has to offer. So, it should come as no surprise that we can also use it to generate sequential dates down a column.
But with dates having three different types of values (days, months, and years), we can have three different series of date values. In this section, we will show you how we can use this fill handle to sequentially generate each of these values in the worksheet.
1. Autofill Days in Google Sheets
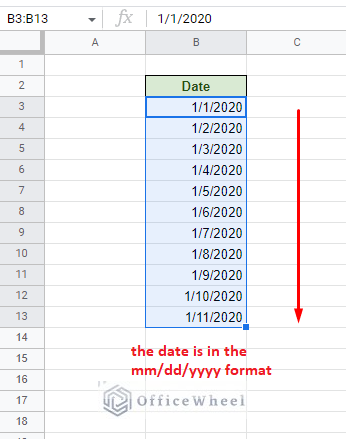
When using the fill handle on a date, it continues the date by increasing the number of days sequentially by default.
How to autofill days using the fill handle:
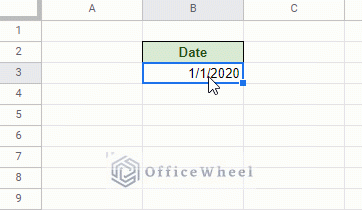
Step 1: Type in a date and select it. You will see a small blue square at the bottom-right of the selected cell.
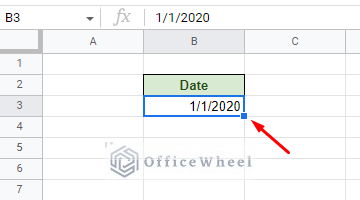
Hovering your mouse over the square will transform the cursor into a plus “+” symbol. This is the fill handle symbol.
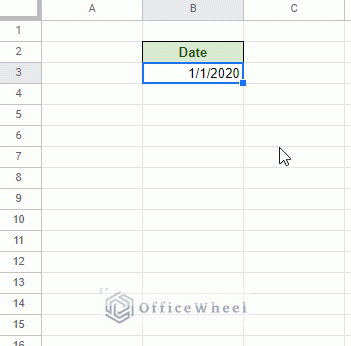
Step 2: As the mouse cursor turns to the plus “+” symbol, click and drag down the column to autofill the cells with the date sequentially.
The series generated is in the form of increasing day numbers. Note that our date format is in the form of mm/dd/yyyy.
Double Click the Fill Handle for a Quick Autofill
A quick and easy way to autofill or continue dates in Google Sheets is by double-clicking on the fill handle.
However, this method only works when there is an adjacent column with values. This sets a limit for the autofill.
2. Autofill Weeks or Other Day Intervals in Google Sheets
As we have just seen, Google Sheets increments only the day number when using the autofill feature by default. But autofill has another lesser-known feature, which is to recognize series and sequences of data.
We will take advantage of this feature for our next few generations of date values.
First up is continuing dates by weeks in Google Sheets.
Step 1: Set the sequence for weekly increments of date. We only need the first two values set 7 days apart from each other. For us, it is done in cells B3 and B4.
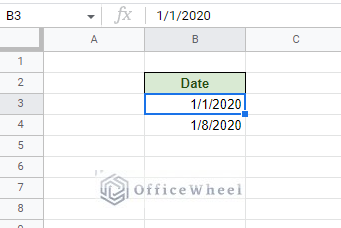
Step 2: Highlight the two values in B3 and B4.
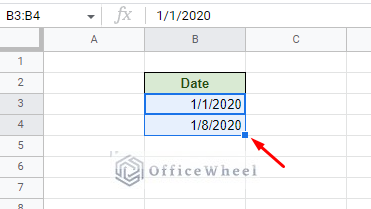
Step 3: Click and drag the fill handle down the column to generate the weekly date sequence.
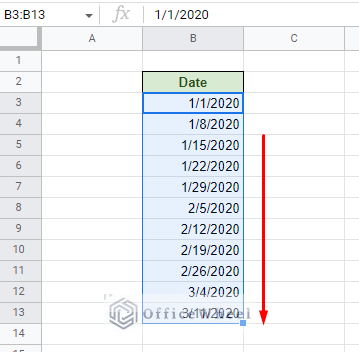
You can create a series of any interval of days using this method. You only need the first two values of the sequence.
3. Autofill Months in Google Sheets
Same as weeks and date intervals, we can autofill continuous months in Google Sheets.
Step 1: Input the first two dates a month apart. Make sure that the other values remain the same. Otherwise, those values will also be included in the sequence. Highlight the two values.

Our date is in the mm/dd/yyyy format.
Step 2: Click and drag the fill handle down the column to generate a series of continuous dates of increasing months.
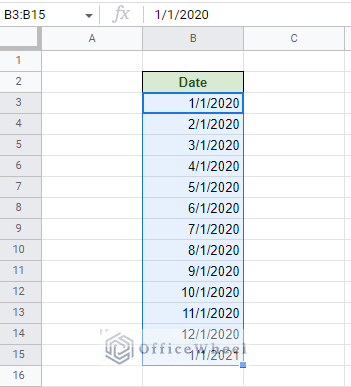
We have generated a series of dates long enough for it to move on to the next year.
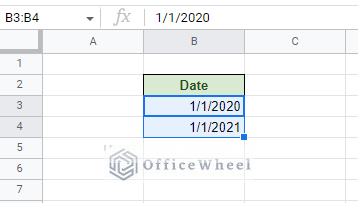
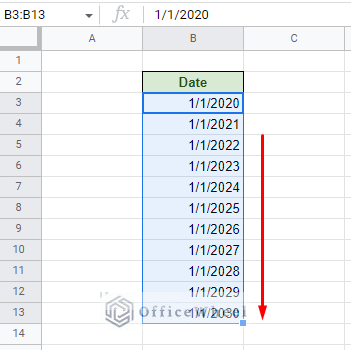
4. Autofill Years in Google Sheets
For auto-filling the sequential increment of years, we once again adopt the same strategy we’ve used for the week and month series.
Step 1: Input and select the first two dates in the column one year apart.
Step 2: Click and drag the fill handle (“+”) down the column to auto-generate the yearly increment of dates.
Can you autofill dates without dragging the fill handle in Google Sheets?
Yes, it is possible, but it is not as effective as you might think. You can autofill but not continue dates without dragging.
When you think about autofill without dragging, the first thing that should come to mind is a keyboard shortcut. To autofill down, the keyboard shortcut is CTRL+D (CMD+D for Mac).
Simply select the cell under the date and apply the shortcut:
As you can see, the keyboard shortcut is filling up the next cell, but:
- You have to move to a fresh new cell to apply the shortcut every time.
- Only one value is copied at a time.
- The output is not sequential, it is only copied from the previous cell.
This autofill keyboard shortcut is better used to copy formulas in Google Sheets.
Continue Sequential Date When Value is Added in Google Sheets
Consider this scenario: What if we could generate a date in sequence every time a new data was entered?
Let’s visualize what we are aiming for:
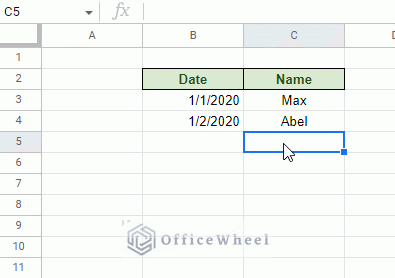
Looks not only interesting but handy as well.
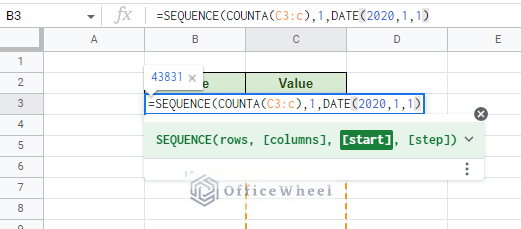
The formula we have used is in the date column and is only applied in cell B3:
=SEQUENCE(COUNTA(C3:C),1,DATE(2020,1,1))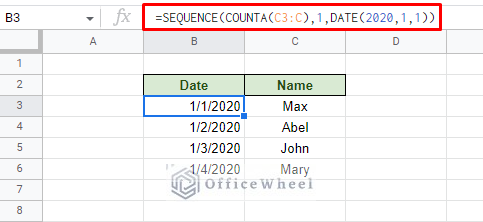
We all know that Google Sheets has a date code assigned to each date which increases by 1 every day. The SEQUENCE function takes advantage of this fact to generate an incremental date value.
The SEQUENCE function syntax:
SEQUENCE(rows, columns, start, [step])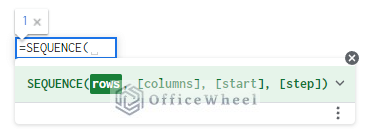
Another advantage of this function is that it can take a range of cell references as arguments, making it dynamic enough to automatically generate results with input.
Let’s see how we’ve applied this formula:
Step 1: Open the SEQUENCE function in an empty cell, preferably adjacent to our input column. Apply the COUNTA(C3:C) formula as the “rows” argument.
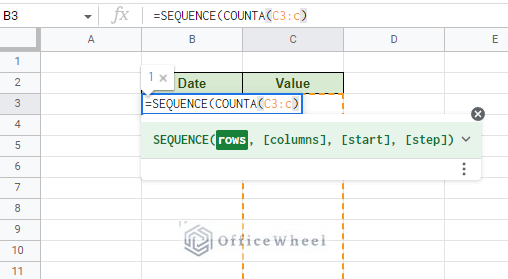
The COUNTA function will count all non-empty cells in the given range. We have kept the cell range unlocked (C3:C) to make our formula dynamic.
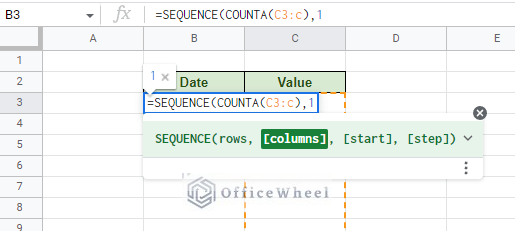
Step 2: The “columns” argument is optional. We’ve set the value as 1 as we want to return our sequence in a single column.
Step 3: Since we start our sequence with a date, we must present a date as the “start” argument. The best way to do this is by using the DATE function.
Step 4: Close parentheses and press ENTER. What we get is the date code of the date 1/1/2020.
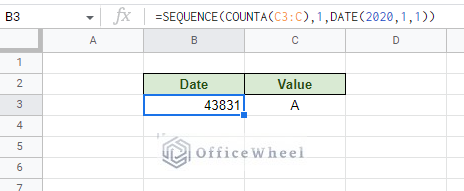
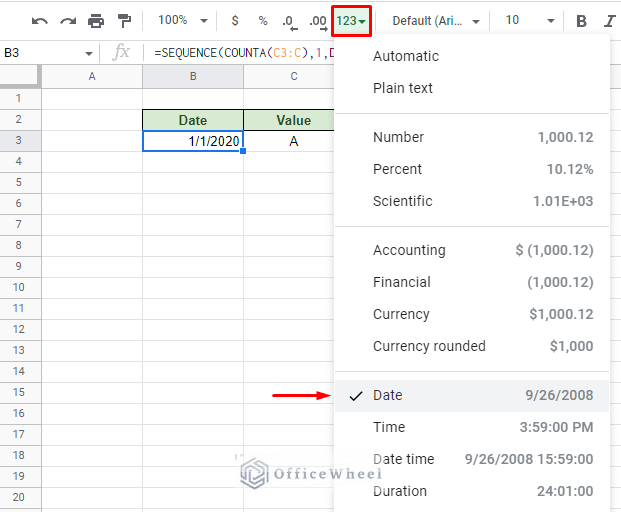
Simply format the cell to show the date. We have gone for the “mm/dd/yyyy” format.
With every data we enter in the Value column, the Date column will generate the next date.
Update Date When Worksheet is Updated in Google Sheets
What we are looking for here is an automatically updating timestamp for every time the worksheet is updated.
The two perfect functions for this are the TODAY and NOW functions.
- They require no arguments to work.
- They are both “running” functions. This means that they automatically update themselves with each change to the worksheet.
The TODAY function only returns the date, whereas the NOW function returns the date and time.
The functions in action:
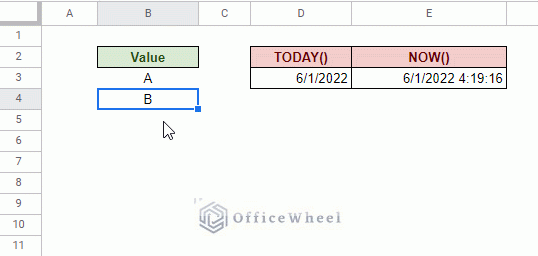
Since we are working live, we will see no changes with the date in TODAY’s cell. Whereas we can clearly see the time update in NOW’s cell.
Final Words
That concludes all the ways we can autofill or continue dates in Google Sheets. Thanks to the application’s fill handle and sequencing feature, the task is that much easier.
Feel free to leave any queries or advice you might have for us in the comments section below. Or have a look at some of our other date-related articles that are sure to interest you.
Related Articles for Reading
- How to Convert Text to Date in Google Sheets (3 Easy Ways)
- Convert Date to Month and Year in Google Sheets (A Comprehensive Guide)
- Calculate with Weekdays Only in Google Sheets (An Easy Guide)
- Use DATEDIF from Today in Google Sheets (An Easy Guide)
- Find Weekday Name from a Date in Google Sheets (3 Easy Ways)