Today, we have for you a simple guide explaining how to insert a textbox in Google Sheets. We dive into the nitty-gritty of the “whys” on top of the “hows” as well as discuss some formatting features.
So, we begin with a question:
Why Do We Need a Textbox in Google Sheets?
Textboxes in spreadsheets are primarily used for accommodating large amounts of text in a single location and also to act as comments.
We know that Google Sheets already allows us to add comments. But they are not always visible to the user until you click on the cell that contains it.
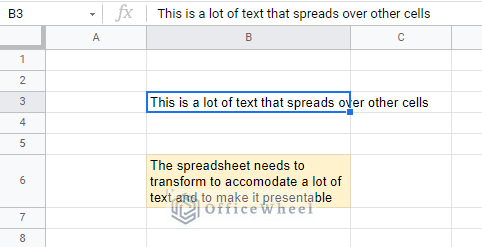
Moving on to the topic of “a lot of text”, Google Sheets cannot accommodate large strings in a single cell without having to change the structure of the spreadsheet itself.
So, the obvious solution to this problem can be the presence of a simple textbox.
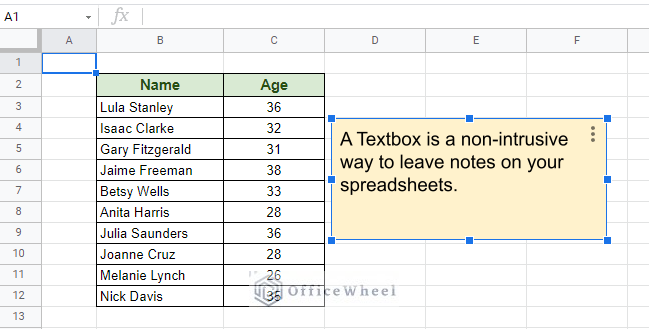
The main advantage of the textbox lies in its mobility and non-intrusiveness. Meaning that you can move the box around and it does not change the layout of the spreadsheet when you add it in.
Making this the best way to add notes to your spreadsheet without having to worry about adding, removing, or changing data to accommodate these notes in your spreadsheets.
Let’s see how we can add a textbox to our spreadsheet.
How to Insert a Textbox in Google Sheets
Unlike Excel, Google Sheets does not have a dedicated “Insert Textbox” button available in its toolbar. Instead, you have to navigate to a special option to get access to it.
Simply follow these steps:
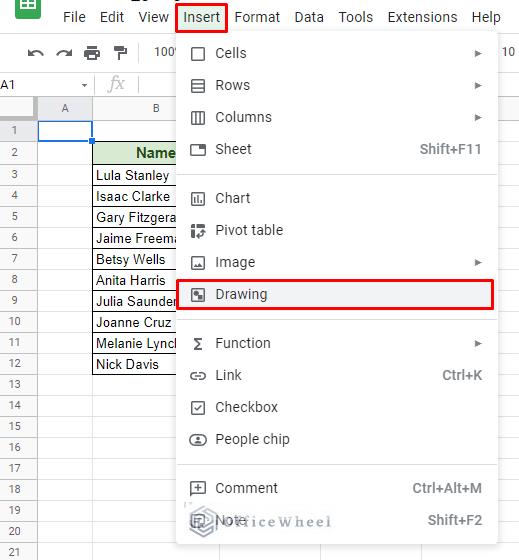
Step 1: Navigate to the Drawing option from the Insert tab. Insert > Drawing
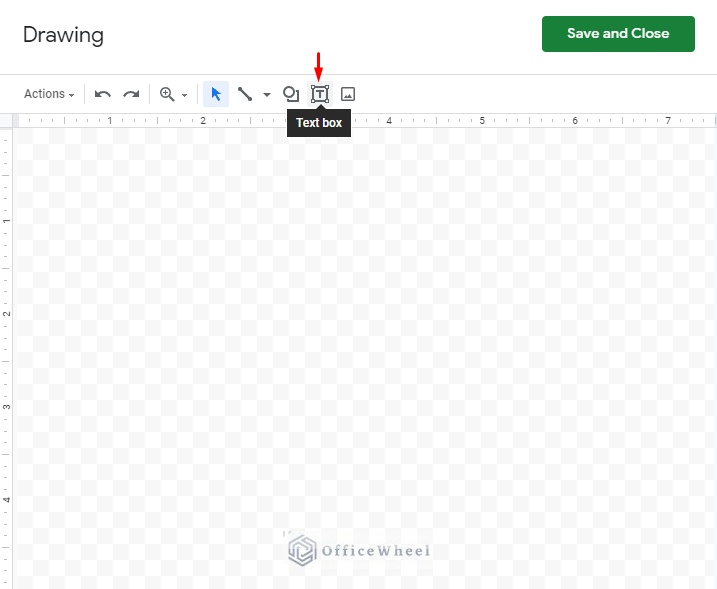
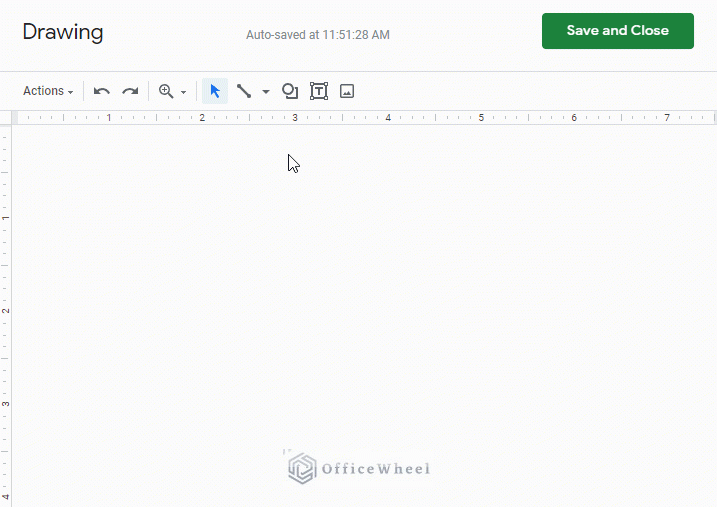
Step 2: In the Drawing window, select the Text box option.
Selecting it will allow you to draw a general textbox.
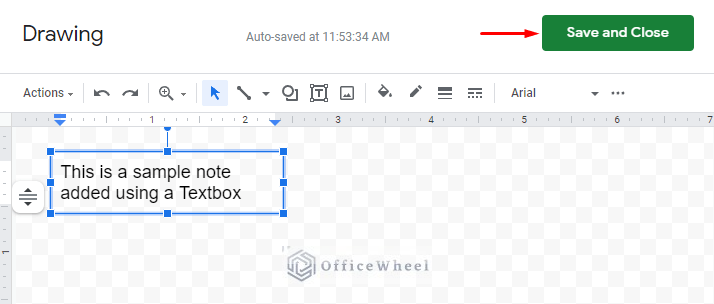
Step 3: Write your desired note in the textbox and click Save and Close.
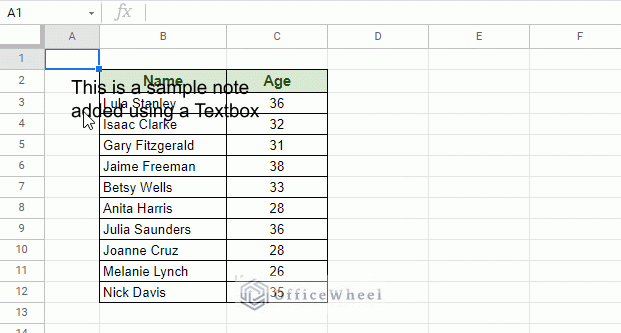
Step 4: The textbox will be inserted just below your active cell. You are free to select it and move it to any location within the spreadsheet.
And that’s it! That is how you insert a textbox in Google Sheets.
A Major Con of the Google Sheets Textbox:
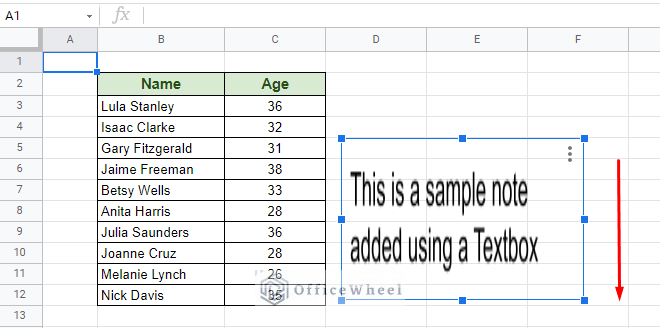
Unfortunately, Google Sheets views its newly created textbox more like an image than an actual editable block of text. Meaning, if you try to expand the textbox within the spreadsheet, the contents will stretch according to the expansion and be distorted. As an image would.
This is in line with the fact that we have created this textbox from the Drawing option of Google Sheets.
However, if you want to edit or format your textbox, simply click on the ellipses and select the Edit option (top-right corner).
More on text box formatting in the next section.
Styling and Formatting Our Textbox
Back in the Drawing window, we have a few customization options that we can apply to our textbox. In this section, we will discuss some of them.
1. The Textbox’s Behavior with Text
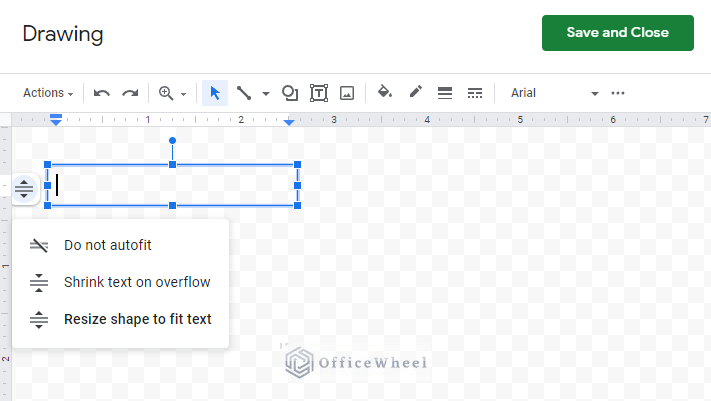
When you draw a textbox, you are presented with three options to determine how the box will behave according to the text in them. They are:
- Do not autofit: The boundaries of the box do not autofit to the text. Meaning that whatever size of the box you draw, the boundaries of the textbox will remain static. Text can overflow.
- Shrink text on overflow: This option automatically shrinks the size of the text if it overflows beyond the boundaries of the box.
- Resize shape to fit text: The opposite of option B. It resizes the border of the textbox to fit the text within it.
Option C is selected by default.
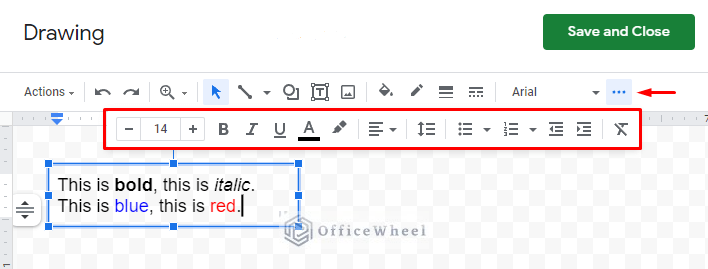
2. Text Formatting
The textbox provides all the fundamental customization options that are available in Google Sheets.
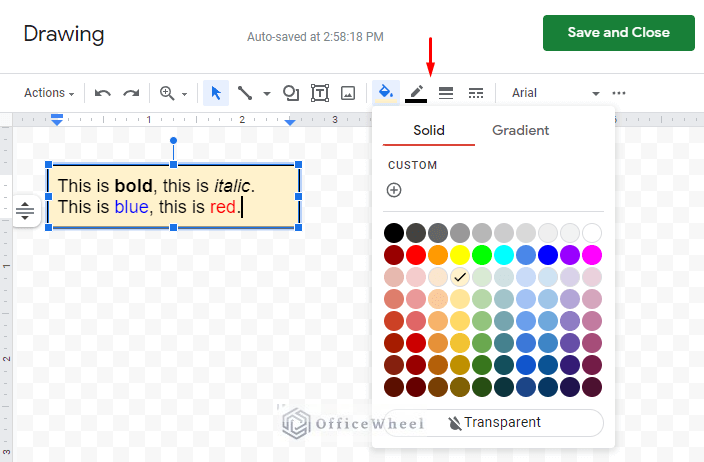
3. Textbox Formatting
Finally, you can format the box itself as you would for any other shape in Google Sheets or Docs. Be it borders, background colors, etc.
Final Words
With that, we conclude our simple guide on how to insert a textbox in Google Sheets. We hope that this article answered some of the questions that you had before coming in.
Please feel free to leave any queries or advice you might have for us in the comments section below.

