In this article, we will look at a few scenarios to format a cell as text in Google Sheets.
There are many reasons why we’d want to do that, of which, the most important is to present a type of data that’d otherwise show a different value.
But, before we discuss those scenarios, let’s understand some basics for data types in Google Sheets.
How to Recognize Whether a Cell in Google Sheets has a Text Value or Not?
By default, any text value input in a cell of a Google Sheets Worksheet will be left aligned. The other type, numbers, will be right aligned.
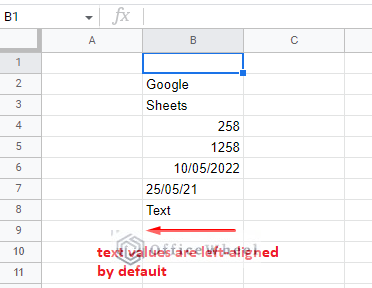
But what happens when the formatting of the cells is center-aligned?
You can’t visually decipher whether the value is text or not.
In such cases, we can easily check the type of value of the cell using the ISTEXT function:
=ISTEXT(B2)
Once we’ve recognized the type of data in the cells, it becomes quite easy to work with those values.
Thus, we come back to today’s topic of working with cells as text in a Google Sheets spreadsheet.
3 Scenarios to Format Cell as Text in Google Sheets
In the following sections, we will see 3 different scenarios and their respective processes where setting the cell value as text has advantages.
1. Format the Cell as Plain Text in Google Sheets
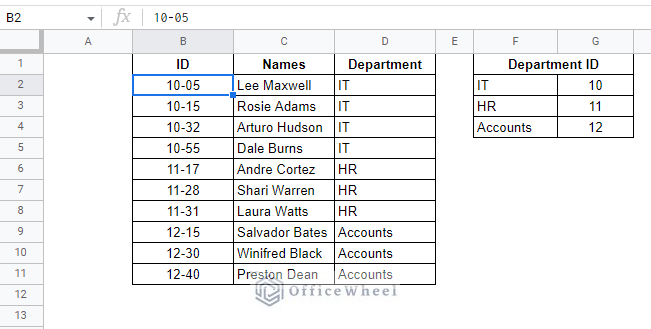
In the following worksheet we see a common problem faced during data entry in any spreadsheet application:
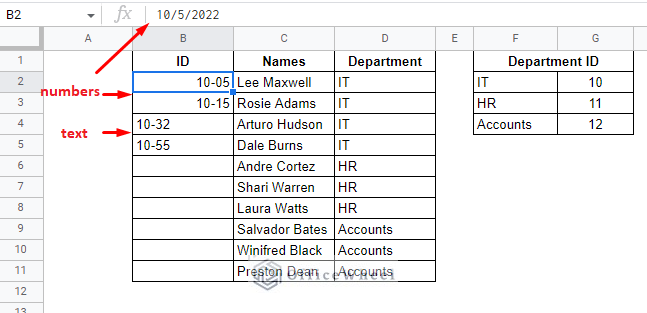
According to the dataset, we can see that each Department has a special ID, followed by a dash (-) and then the employee serial number. The entire thing makes up the ID.
But when a certain arrangement of values is input in a cell, Google Sheets may automatically recognize it in an unwanted format.
For example, the dataset above sees the value 10-05 as the date 5th of October. And for the value that is not a valid date, 10-32, it is set as a text.
We are obviously not inputting for a date value, nor do we want these values in the column. In such cases, it is justified to format the cell as a text in Google Sheets, so that we get the foundation value only.
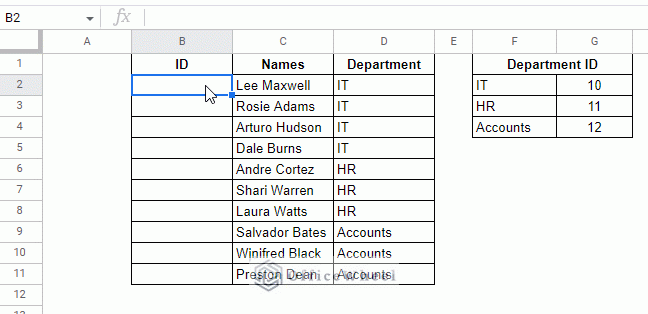
Step 1: Select the cells you want to format. Then navigate to the More formats button in the toolbar.

Step 2: Select the Plain text option from the list.

Step 3: Now enter the data in the respective cells.
As you can see in the image above, the input is no longer seen as a date value keeping us safe from any future formatting changes during the import or export of the worksheet.
The final look after setting the cells to be center-aligned:
2. Using the Apostrophe Operator (‘) to View Cell as Text
The apostrophe operator (‘) is a lifesaver when it comes to presenting many data types as we want them.
Its use becomes that crucial since Google Sheets loves to automatically recognize certain value types without user consent.
While in 90% of cases, it’s fine and even welcome, there are some scenarios where the user may want to present a different value.
Let’s look at a couple of these and how we can use the apostrophe operator to get what we want:
I. For Numbers with a Prefix
Some numerical data may have symbolic prefixes that give them meaning. For example, it is common to see the plus symbol (+) in form of phone number data.
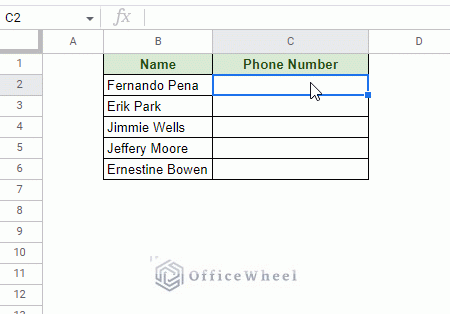
However, trying to input phone numbers this way does not go as planned:

Not only does the plus (+) disappear, but Google Sheets also sees this as a formula and sets the value as a number inside a formula as seen by the equal symbol (=) in the formula bar.
The remedy is to include the apostrophe before entering the Phone Number:
The apostrophe not only makes the plus symbol (+) visible in the cell but also makes itself invisible from the cell so as to not intrude visibly on the user.
But it can still be seen in the formula bar.

II. Show Formula as Text in Google Sheets
Many users of Google Sheets want to show the formulas they are using. This can be educational and help future users to build on these formulas.
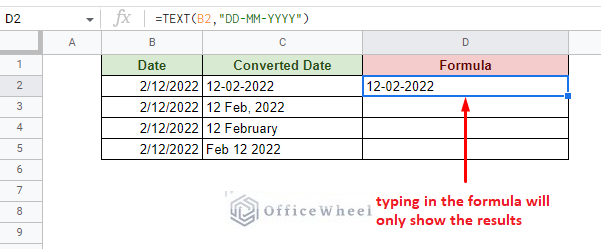
But the thing is, we cannot use traditional formatting to show formulas in a cell of Google Sheets since doing so automatically shows the result of the formula and not the formula itself:
To show the formula as the formula only, include an apostrophe (‘) before the formula (before =):
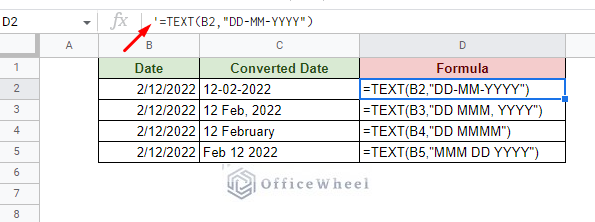
The results for both instances of using the apostrophe operator will be shown as text.
3. Using the TEXT function to Format the Value of a Cell as Text
While Google Sheets provides a great way to convert and format cell values as text, it is still limited in many regards.
That’s where the TEXT function comes to the rescue.
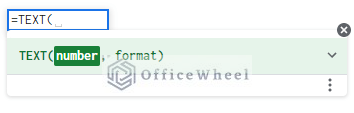
As you can see from the syntax, the function takes a number value to format a text equivalent to that given in the format field.
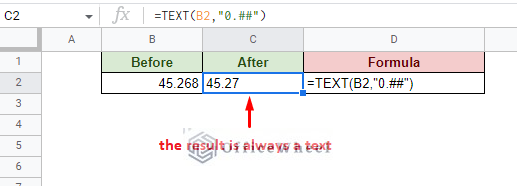
However, whatever format you use, the resultant value will always be in the text format.
While this may be a downside on the surface, it instead can also make the result immune to accidental formatting later.
Another plus side of using TEXT is that it leaves the original data untouched, making the function a perfect carrier of number data to different cell locations and worksheets.
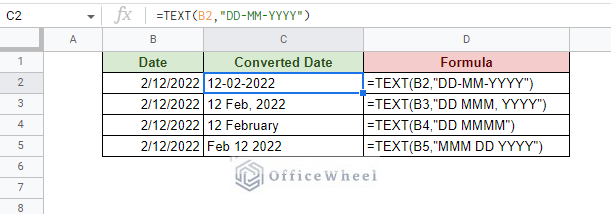
That said, one of its best uses is when formatting date cells to different formats in Google Sheets.
Here is a short example that we’ve seen previously of some of the ways we can use the TEXT function to format date values.
Learn More: How to Convert Date to String in Google Sheets (An Easy Guide)
Final Words
That concludes all the scenarios where we format cell values as text in Google Sheets.
Most of these scenarios can be worked with simple built-in features. But if you want more control over the formatting, the TEXT function is the way to go.
Feel free to leave any queries or advice you might have in the comments section below.
Related Articles for Reading
- How to Convert Number to Text in Google Sheets (3 Easy Ways)
- Google Sheets: Custom Number Format (A Comprehensive Guide)
- Google Sheets: Convert String to Number (4 Easy Ways)
- How to Add Commas to Numbers in Google Sheets
- Format a Number with a Formula in Google Sheets