Over the years, Google Sheets has continued to add much-needed features with every update, especially those catered toward making data presentation easy. One such feature is the autofill of Google Sheets.
In this simple guide, we will discuss how to apply an autofill for different types of data as well as have a look at other new features related to it in Google Sheets.
Let’s get started.
How to Autofill Values in Google Sheets
Auto-filling any data in Google Sheets revolves around the Fill Handle.
The fill handle is the small blue square that you see in the bottom-right corner of the active cell.
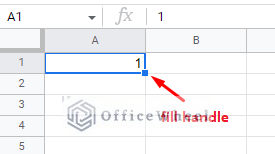
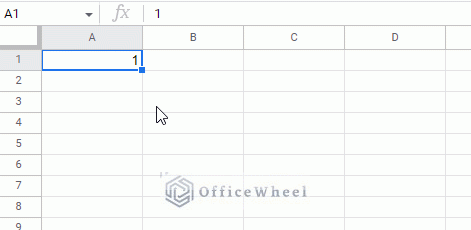
Step 1: Placing the mouse cursor over the fill handle transforms it into a plus (+) symbol.
Step 2: At this point, you can click and drag the cursor in any direction (horizontal or vertical) to automatically fill the cells with the active cell value.
This is the primary way to autofill values in Google Sheets.
Autofill in Google Sheets Without Dragging
Sometimes clicking and dragging may just not cut it. This is especially true when you have to autofill the same data in a worksheet over a large data range.
For that, Google Sheets provides us with a way to autofill values without dragging. That is by simply double-clicking the fill handle.
However, double-clicking to autofill is not exactly the same as dragging to autofill in Google Sheets. There are two points to note about this method.
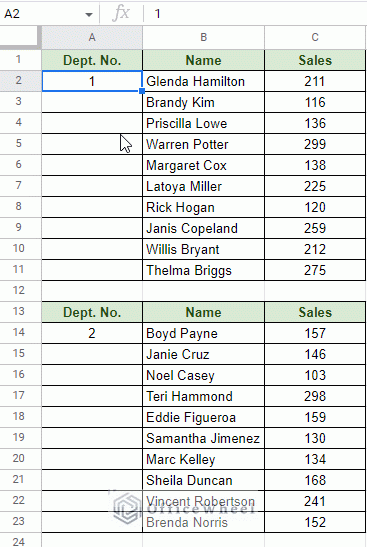
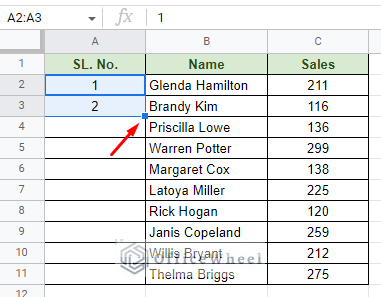
1. Using the double-click method the active cell and corresponding auto-fillable cells require adjacent value cells. As you can see in the image above, the autofill stops immediately at the same row as the last names.
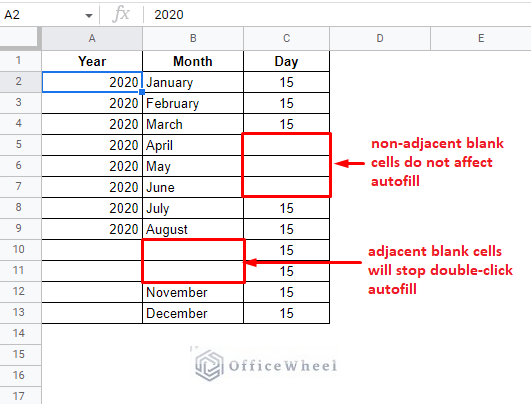
In the image below, you will see the double-click autofill stop when there is a gap in the adjacent column:
2. The double-click autofill only auto-fills with the value that is in the active cell.
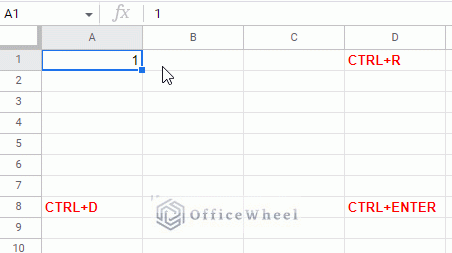
Autofill Using Shortcuts
If you are looking for that little edge in efficiency, Google Sheets has got you covered with its keyboard shortcuts.
We have three different shortcuts that we can use to autofill in Google Sheets:
- CTRL+D (Fill Down)
- CTRL+R (Fill Right)
- CTRL+ENTER (Fill All)
For Mac users: Use ⌘ instead of CTRL.
On their own, these shortcuts do nothing as Google Sheets cannot determine the data range for the fill. So, the user must select or highlight the range of cells where these autofill shortcuts need to be applied.
Examples of Using Autofill in Google Sheets
Autofill is not limited to generating a single value throughout the data range. There are scenarios where you may need to autofill a sequence of values or even formulas. For that, the application has updated its autofill feature enough.
Let’s see how we can do that with a few examples.
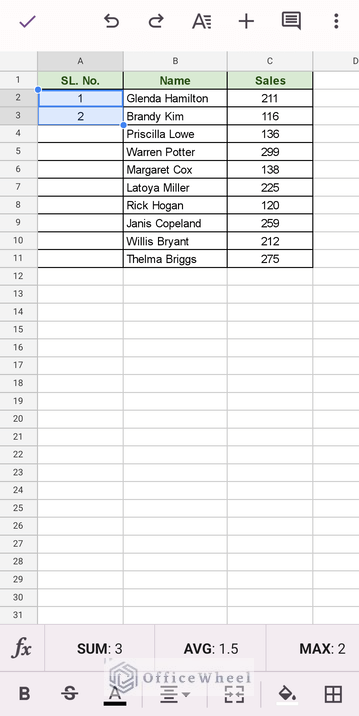
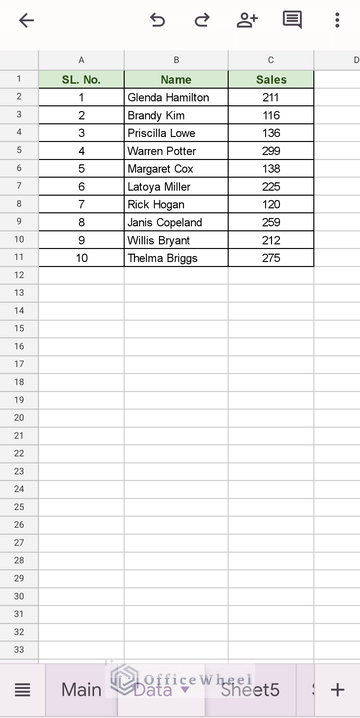
1. Autofill a Series/Sequence of Numbers
A common use of autofill is to generate a sequence of numbers. But, as we have seen just previously, using the fill handle on a single value only auto-fills the active cell value. So, how do we autofill a sequence of numbers in Google Sheets?
Step 1: Input the first two values of the sequence. Selecting these two values will present a fill handle under the second value.
Step 2: Click and drag the fill handle down the column to autofill it with the series of numbers.

And we are done!
Note: The double-click method will work for this particular sequence. However, for a series of numerical values that have a difference of greater than 1, then the double-click (non-drag) method will not work.
Auto-filling numerical values are not limited to serial numbers, you can also use this method to autofill a sequence of values or even dates, which are numerical themselves.
Learn More: How to Autofill Numbers in Google Sheets (An Easy Guide)
2. Autofill Formulas in Google Sheets
Another common use of autofill is to fill formulas down a column.
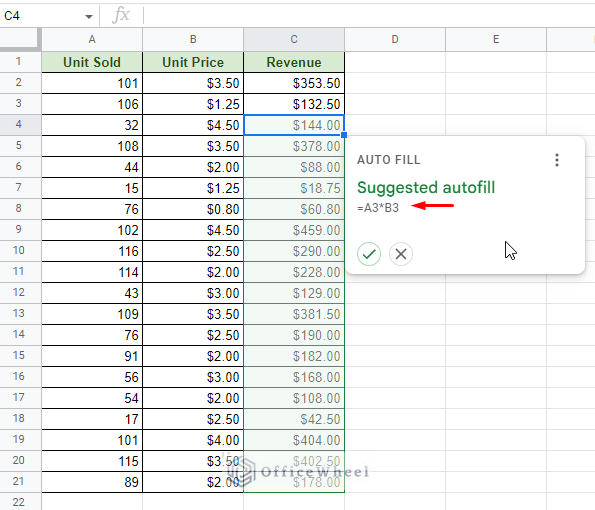
Consider the following dataset where we have a formula already inserted in the first row:
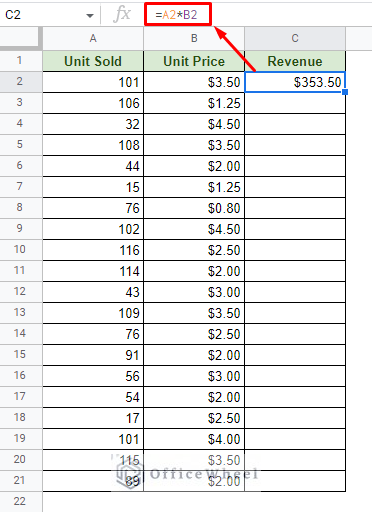
We want to apply the formula for each row of the dataset. How do we do that?
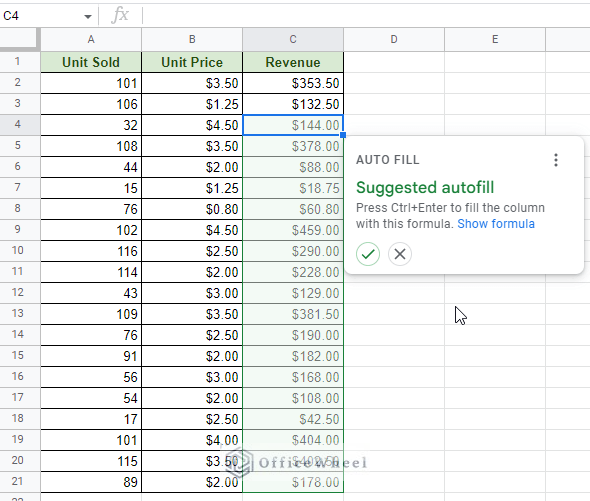
Fortunately, it is nothing new. We can use the fill handle to autofill formulas in Google Sheets.

As you can see from the image above, the autofill automatically updates the cell references in the formula accordingly.
Learn More: How to Autofill Formula in Google Sheets (3 Easy Ways)
New Feature: Google Sheets Smart Fill
Smart Fill of Google Sheets has been around for a couple of years now. While this is not necessarily new, many users are now discovering its various uses. You may have already encountered it while using Sheets.
Smart Fill is meant to automatically predict data and formulas to autofill down a column in Google Sheets.
To initiate a smart fill, simply type in relative data in a cell. For example, we will begin by adding a formula to a cell. As we continue adding, a suggestion box will pop up:
Clicking on Show formula will show you the formula that Google Sheets smart fill will use to autofill.
This feature is not limited to simple formulas only, it works with virtually any value that has a pattern to it.
How to Perform Autofill in Google Sheets Mobile App (Android/iOS)
Google Sheets has its own version of the mobile application to help users on the go. While it is still missing many features, most basic features are available. One of which is autofill.
Autofill in Google Sheets mobile app follows a similar method to that of the browser version.
For this example, we will autofill a numerical sequence in the mobile app.
Step 1: Input and select the first two values of the sequence. Tap once on the first value then drag it onto the second cell.
Step 2: As you can see the fill handle in the Google Sheets mobile app is circular. Tap, hold and drag the fill handle to select the entire column. Tap on any selected cell to bring up the menu. Here you’ll find the Auto-fill option.

Step 3: Tapping on the Auto-fill menu will autofill the selected cells in the sequence of the first two values.
Final Words
That concludes our simple guide on how to apply and use autofill in Google Sheets. The autofill feature is nearly as old as the inception of spreadsheet software. But even then, Google Sheets continues to innovate to cater to user convenience. One outcome of this innovation is the Smart Fill.
Feel free to leave any queries or advice you might have in the comments section below.