In this article, we will look at how we can format cells to fit text and other values in Google Sheets automatically.
But first, let’s understand the importance of doing so.
Why Do You Need to Format Cells to Fit Data?
A Google Sheets worksheet has a fixed size for all its cells. Each cell is measured in pixels and has a width and height of 100 px and 21 px respectively.
However, due to the nature of data inputs, it is highly likely that a user can easily go beyond the default width of the cell, especially when inputting text.
We can see this in the image below:
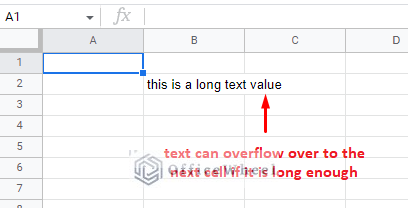
This is called an overflow.
We can also see a different outcome when we input a value on the adjacent tight cell of the overflowing cell:
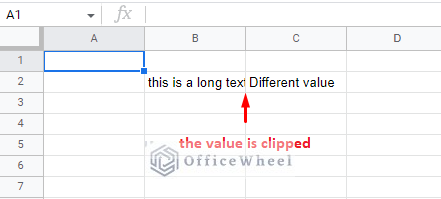
This is called clipping.
In either of the cases, the data is not conveyed correctly. Thus, formatting the cell size becomes quite important.
While there are multiple ways to do so, Google Sheets already has the capability to recognize the length of the data in a cell passively. And thus, it has ways to format cells to fit the data automatically.
We will see these methods in this article.
2 Ways to Format Cells to Fit Text and Other Values in Google Sheets
1. Double-Click to Fit Cells to the Values in a Column (Shortcut)
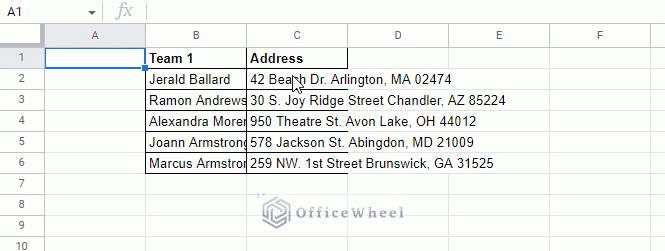
In the following dataset, we have two columns containing names and their respective addresses:
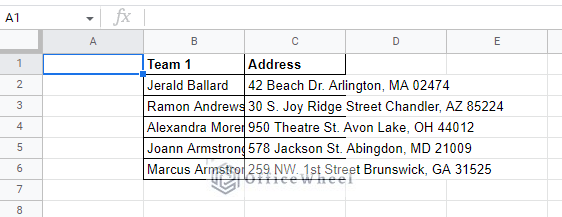
Here, we have both cases of clipping and overflow in some of the cells.
Follow these steps to automatically fit the text to the cells in Google Sheets:
Step 1: Move the mouse cursor to the right edge of the column number. Here, the cursor will transform to one that looks like two arrows pointing away from each other.
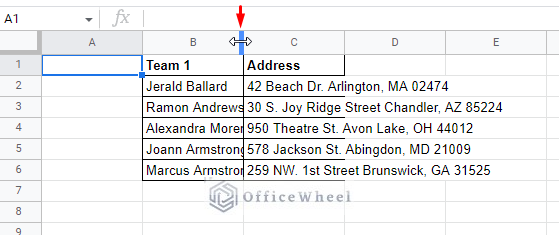
Step 2: Double-click at this point to command the worksheet to automatically update the width of the column to fit the widest text in it. We can do this for any column.
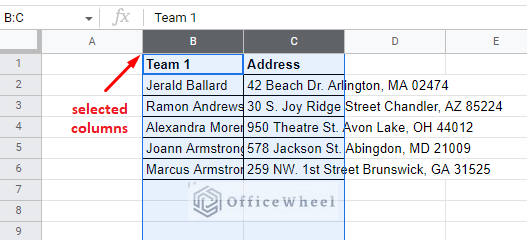
We can also apply this method to autofit multiple columns at once.
To do so, simply select the columns that you want to autofit. You can do this in two ways:
- SHIFT+Click on the column numbers. This selects all adjacent columns.
- CTRL+Click the column numbers. This selects non-adjacent columns.
Now, double click on the right edge of any of the selected column numbers:
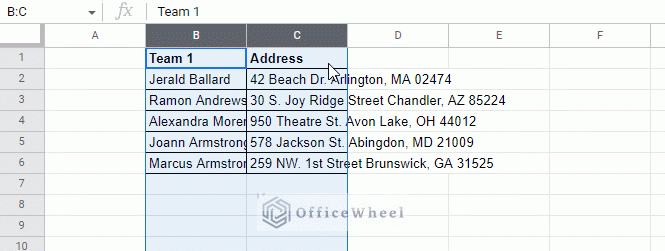
We have successfully formatted the cells of multiple columns to fit the text in Google Sheets.
2. Change the Resize Settings to “Fit to Data” to Format Cells to Fit Text in Google Sheets
A direct alternative to the shortcut method is to open the Resize menu that autofits the cell sizes in Google Sheets.
Step 1: Select the column or columns and right-click over the column number to bring out the menu. Here, you’ll find the Resize column option.
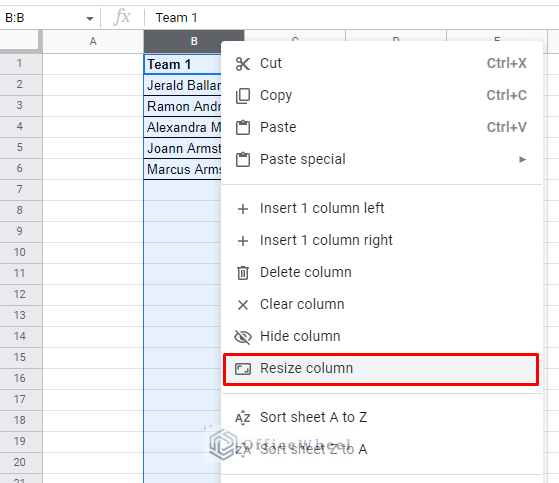
Clicking on it will bring out the Resize window where you can view the current width of the selected column in pixels.
Step 2: Activate the “Fit to data” radio button to set the autofit condition.
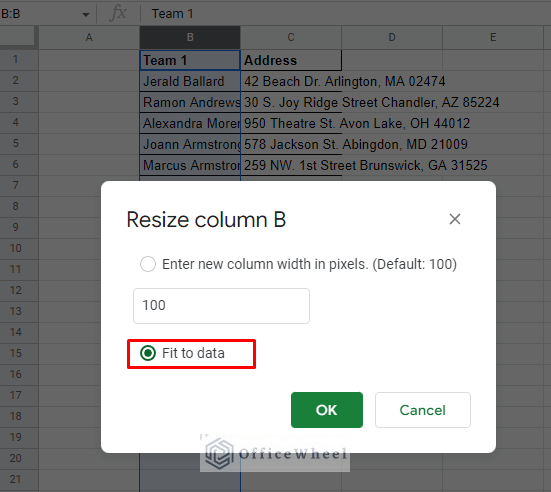
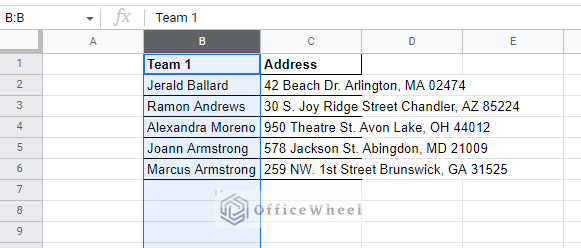
Step 3: Click on OK to see the results.
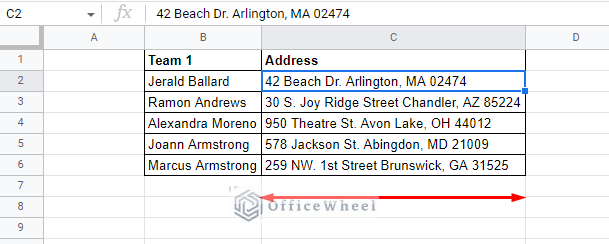
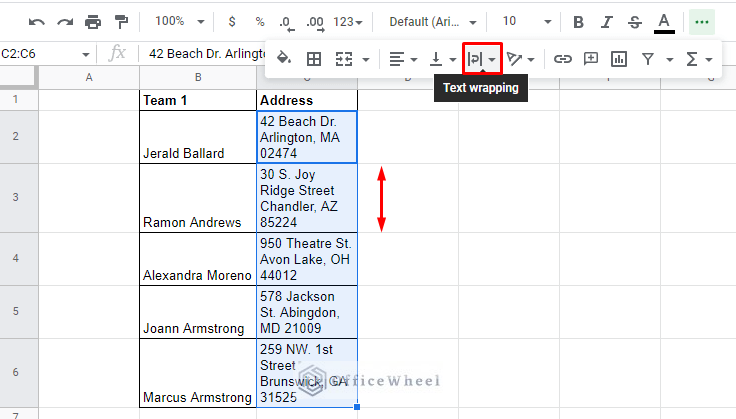
Fit to Data Vs Text Wrapping: What are the Differences?
While both methods are used to fit text within a cell, the end results are quite different:
The “Fit to Data” option adjusts the cell size/width to accommodate the text within it.
Text wrapping adjusts the text or string within the cell to fit the width of the cell by increasing cell height.
Alternative: Merge Cells to Change Cells Size to Fit Text in Google Sheets
Consider the following worksheet:
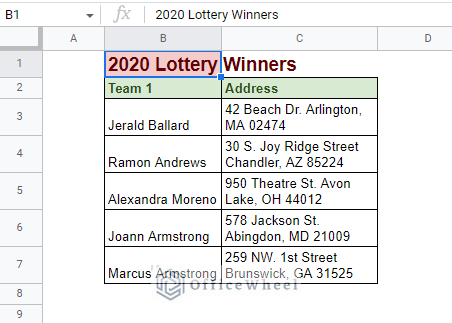
If we want to autofit the title “2020 Lottery Winners” text-overflow by changing the cell width, the rest of the column will be affected.
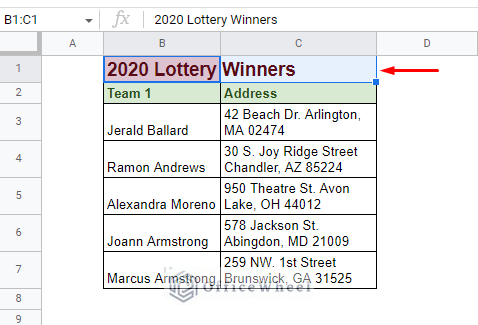
But thankfully, we can control this overflow by merging this cell with an adjacent one to make the cell appear larger.
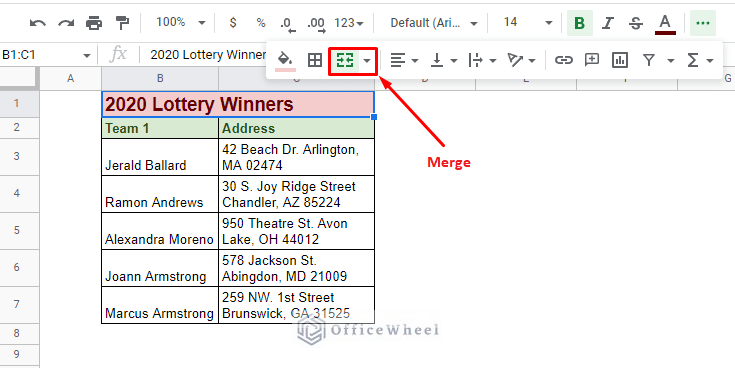
Step 1: Select the cells that you want to merge.
Step 2: Select the Merge option from the toolbar to merge the cells.
Learn More: How to Merge Cells in Google Sheets (4 Ways)
Final Words
As you may have already surmised, even though we have multiple methods to format cells to fit text and other values in Google Sheets, all of them are effective in different scenarios.
We hope that our simple guide has helped you understand these methods and you are now equipped with the knowledge of when to use them.
Feel free to leave any queries or advice you might have in the comments section below.